
Hostinger VPS Tutorial: 10 Steps To Secure Your Server
Setting up a virtual private server can feel overwhelming when you’re unfamiliar with server management. This Hostinger VPS tutorial walks you through the essential steps to configure, secure, and manage your hosting environment.
You’ll learn how to choose a suitable VPS plan, connect securely through SSH, and configure your server. We’ll also explore important security settings that help protect your website and hosting environment.
Next, we’ll cover connecting your domain, installing an SSL certificate, and preparing your website for visitors. These practical steps will help you understand the process without requiring extensive technical experience.
By following this guide, you can develop the confidence to manage your VPS more effectively. You’ll also discover why regular updates, backups, and security monitoring are essential for maintaining a reliable website.
What Is Hostinger VPS Hosting?
Hostinger VPS hosting provides a virtual private server with dedicated allocations of computing resources. Unlike shared hosting, it gives website owners greater control over their server environment and software configurations.
Hostinger uses KVM virtualization to separate virtual servers running on the same physical infrastructure. This allows customers to manage their operating systems, install compatible applications, and customize their hosting environment.
A VPS can host websites, run web applications, support development projects, and manage compatible automation tools. Its flexibility makes it useful for projects that require more control than traditional shared hosting provides.
However, self-managed VPS hosting requires more technical knowledge and responsibility. Before committing, understanding how to choose a web hosting provider can help you evaluate the available options.
Website owners generally need to configure applications, install updates, manage user permissions, and troubleshoot software-related problems. These responsibilities are important when comparing VPS hosting with other WordPress hosting services.
Understanding these responsibilities is essential before choosing a hosting solution. A VPS may offer greater flexibility, but beginners should consider whether they are comfortable handling ongoing server maintenance.
How To Set Up Hostinger VPS: Step-By-Step Tutorial
Setting up a virtual private server involves several important steps, from choosing the right hosting plan to configuring essential security settings. Following a structured approach makes the process easier, especially for beginners.
This Hostinger VPS tutorial walks you through ten practical steps to prepare and secure your server. You’ll learn how to set up secure access, protect your VPS with a firewall, and monitor its performance.
Once you complete these steps, you’ll have a stronger foundation for hosting your website. You can then move on to installing your website software and connecting your domain.
1. Choose The Right Hostinger VPS Plan
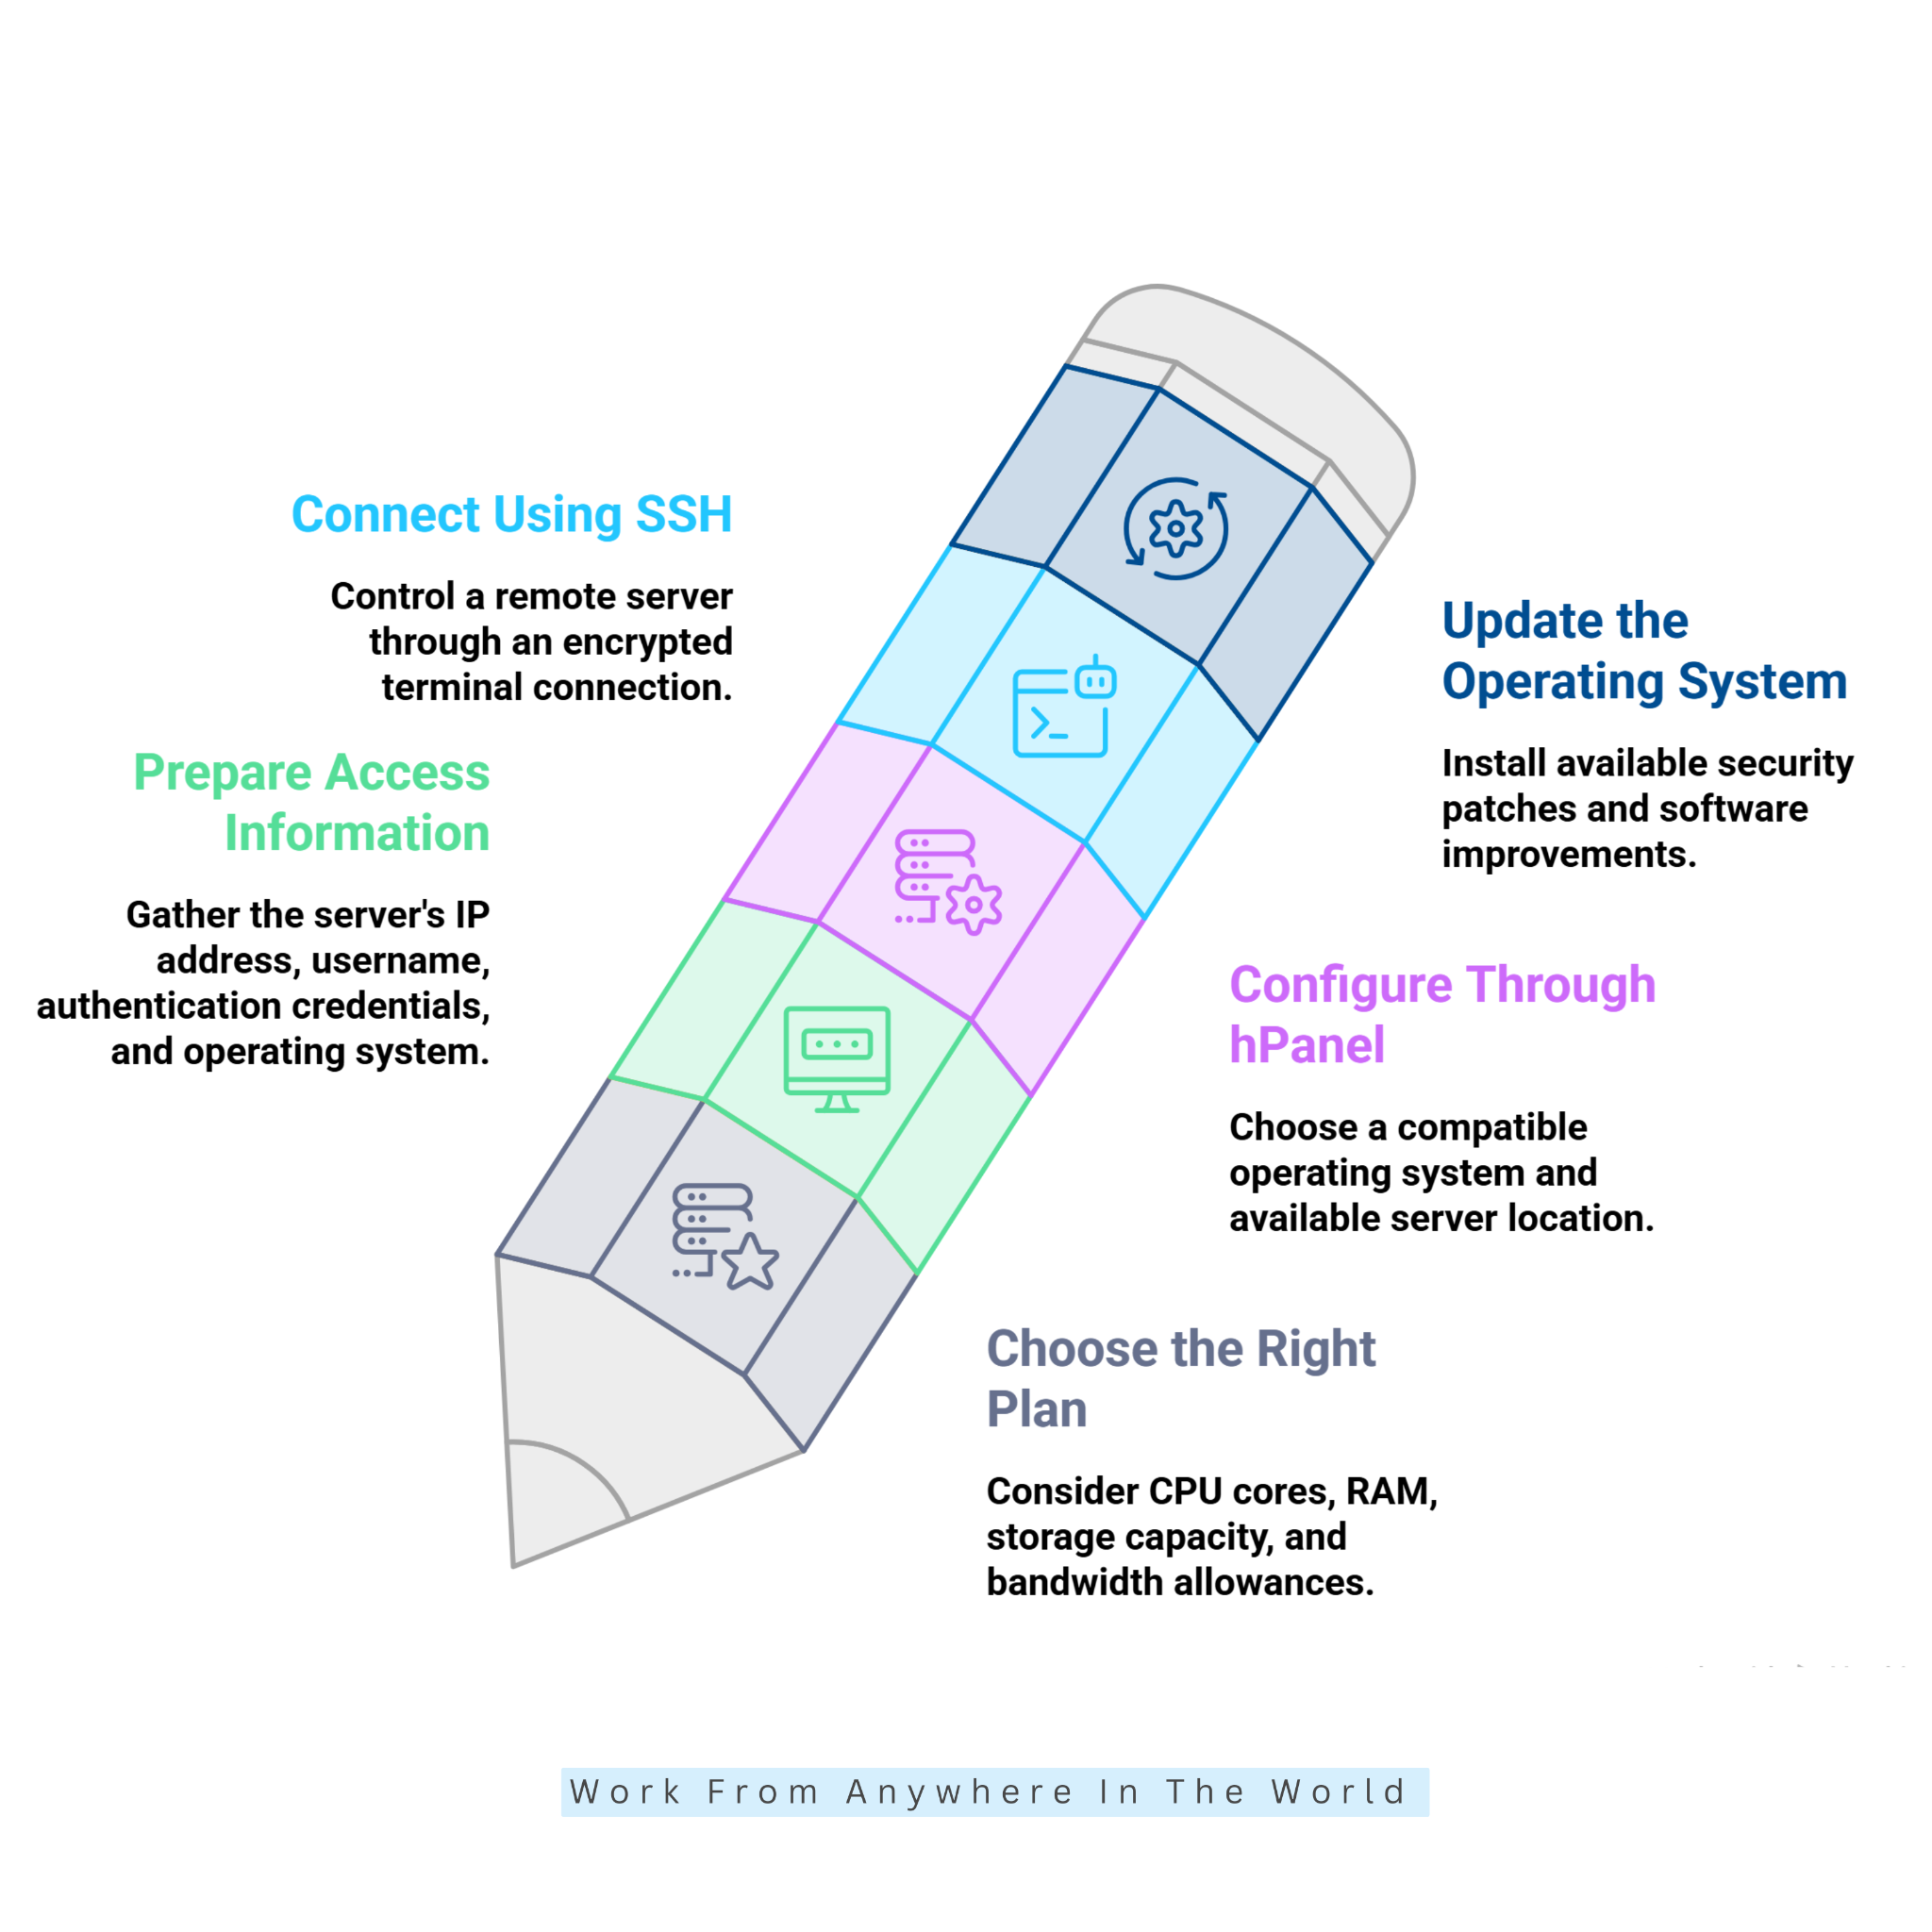
Begin by choosing a VPS plan that matches your website’s requirements. Consider the available CPU cores, RAM, storage capacity, and network resources before deciding.
A small blog or static website may operate comfortably with modest resources. However, an online store or resource-intensive application could require additional memory and processing power.
Your preferred operating system also matters because different applications have different compatibility requirements. Ubuntu and Debian are practical starting points for beginners because they offer extensive documentation and community support.
Before purchasing, compare the available specifications, renewal costs, backup options, and upgrade possibilities. Our Hostinger Review provides additional information about the hosting provider and its services.
2. Prepare The Information You Need
Before configuring your VPS, gather the information required to access and manage your server. This generally includes your server’s IP address, SSH username, authentication credentials, and selected operating system.
If you plan to publish a website, keep your domain registration details available. You’ll need this information later when connecting your domain to the server.
Windows users can connect through Windows Terminal or PowerShell, while macOS and Linux users have built-in terminal applications. These tools allow you to communicate with your VPS using SSH commands.
Hostinger also provides a browser-based Web Console for accessing your server without installing additional software. Preparing everything beforehand helps reduce interruptions during the setup process.
3. Configure Your VPS Through Hostinger hPanel
After purchasing your plan, sign in to Hostinger and navigate to the VPS section of your dashboard. Follow the initial setup instructions to configure your server and select an available operating system.
Ubuntu is a practical choice for beginners following common Linux administration tutorials. Depending on your requirements, you may also select an available application or control panel template.
Choose an appropriate server location and review the hostname and configuration details before proceeding. Once installation finishes, open your VPS Overview page to find its IP address and SSH connection information.
Hostinger’s official VPS dashboard guide explains where to locate server settings, monitoring tools, backups, and security options.
Important: Reinstalling an operating system can erase existing server data. Always verify that you have a usable backup before changing an established VPS installation.
4. Connect To Your VPS Using SSH
Secure Shell (SSH) allows you to manage a remote server through an encrypted terminal connection. Open your computer’s terminal and enter the following command, replacing the placeholder with your actual VPS IP address.
ssh root@YOUR_SERVER_IP
If your server uses another username or SSH port, adjust the command accordingly. You can also copy the appropriate SSH connection command directly from your Hostinger VPS dashboard.
When connecting for the first time, verify the server’s host key fingerprint using a trusted source. Only accept the connection after confirming that you are connecting to the intended server.
Enter your password or authenticate using your configured SSH key when prompted. Password characters usually remain invisible while typing, which is normal.
For a simpler alternative, use Hostinger’s Web Console directly from your VPS Overview page. This allows you to manage the server through your browser.
Never share your private SSH key or administrator password. Once connected, plan to create a separate administrative user and configure SSH key authentication for improved security.
5. Update Your VPS Operating System
Updating your operating system helps install available security patches and software improvements. This should be one of your first tasks before installing additional website applications.
On Ubuntu or Debian, refresh the available package information using the following command.
sudo apt update
Next, install the available package upgrades.
sudo apt upgrade
The first command updates your system’s package lists, while the second installs available upgrades. Review any proposed changes before confirming them, particularly when working with an existing website.
Other Linux distributions use different package managers, so follow the instructions for your selected operating system. Some updates may require restarting your server before they take effect.
If you are working on a live website, create a verified backup and plan updates carefully. Regular maintenance helps keep your VPS secure, stable, and compatible with supported applications.
6. Create A Non-Root Administrator Account
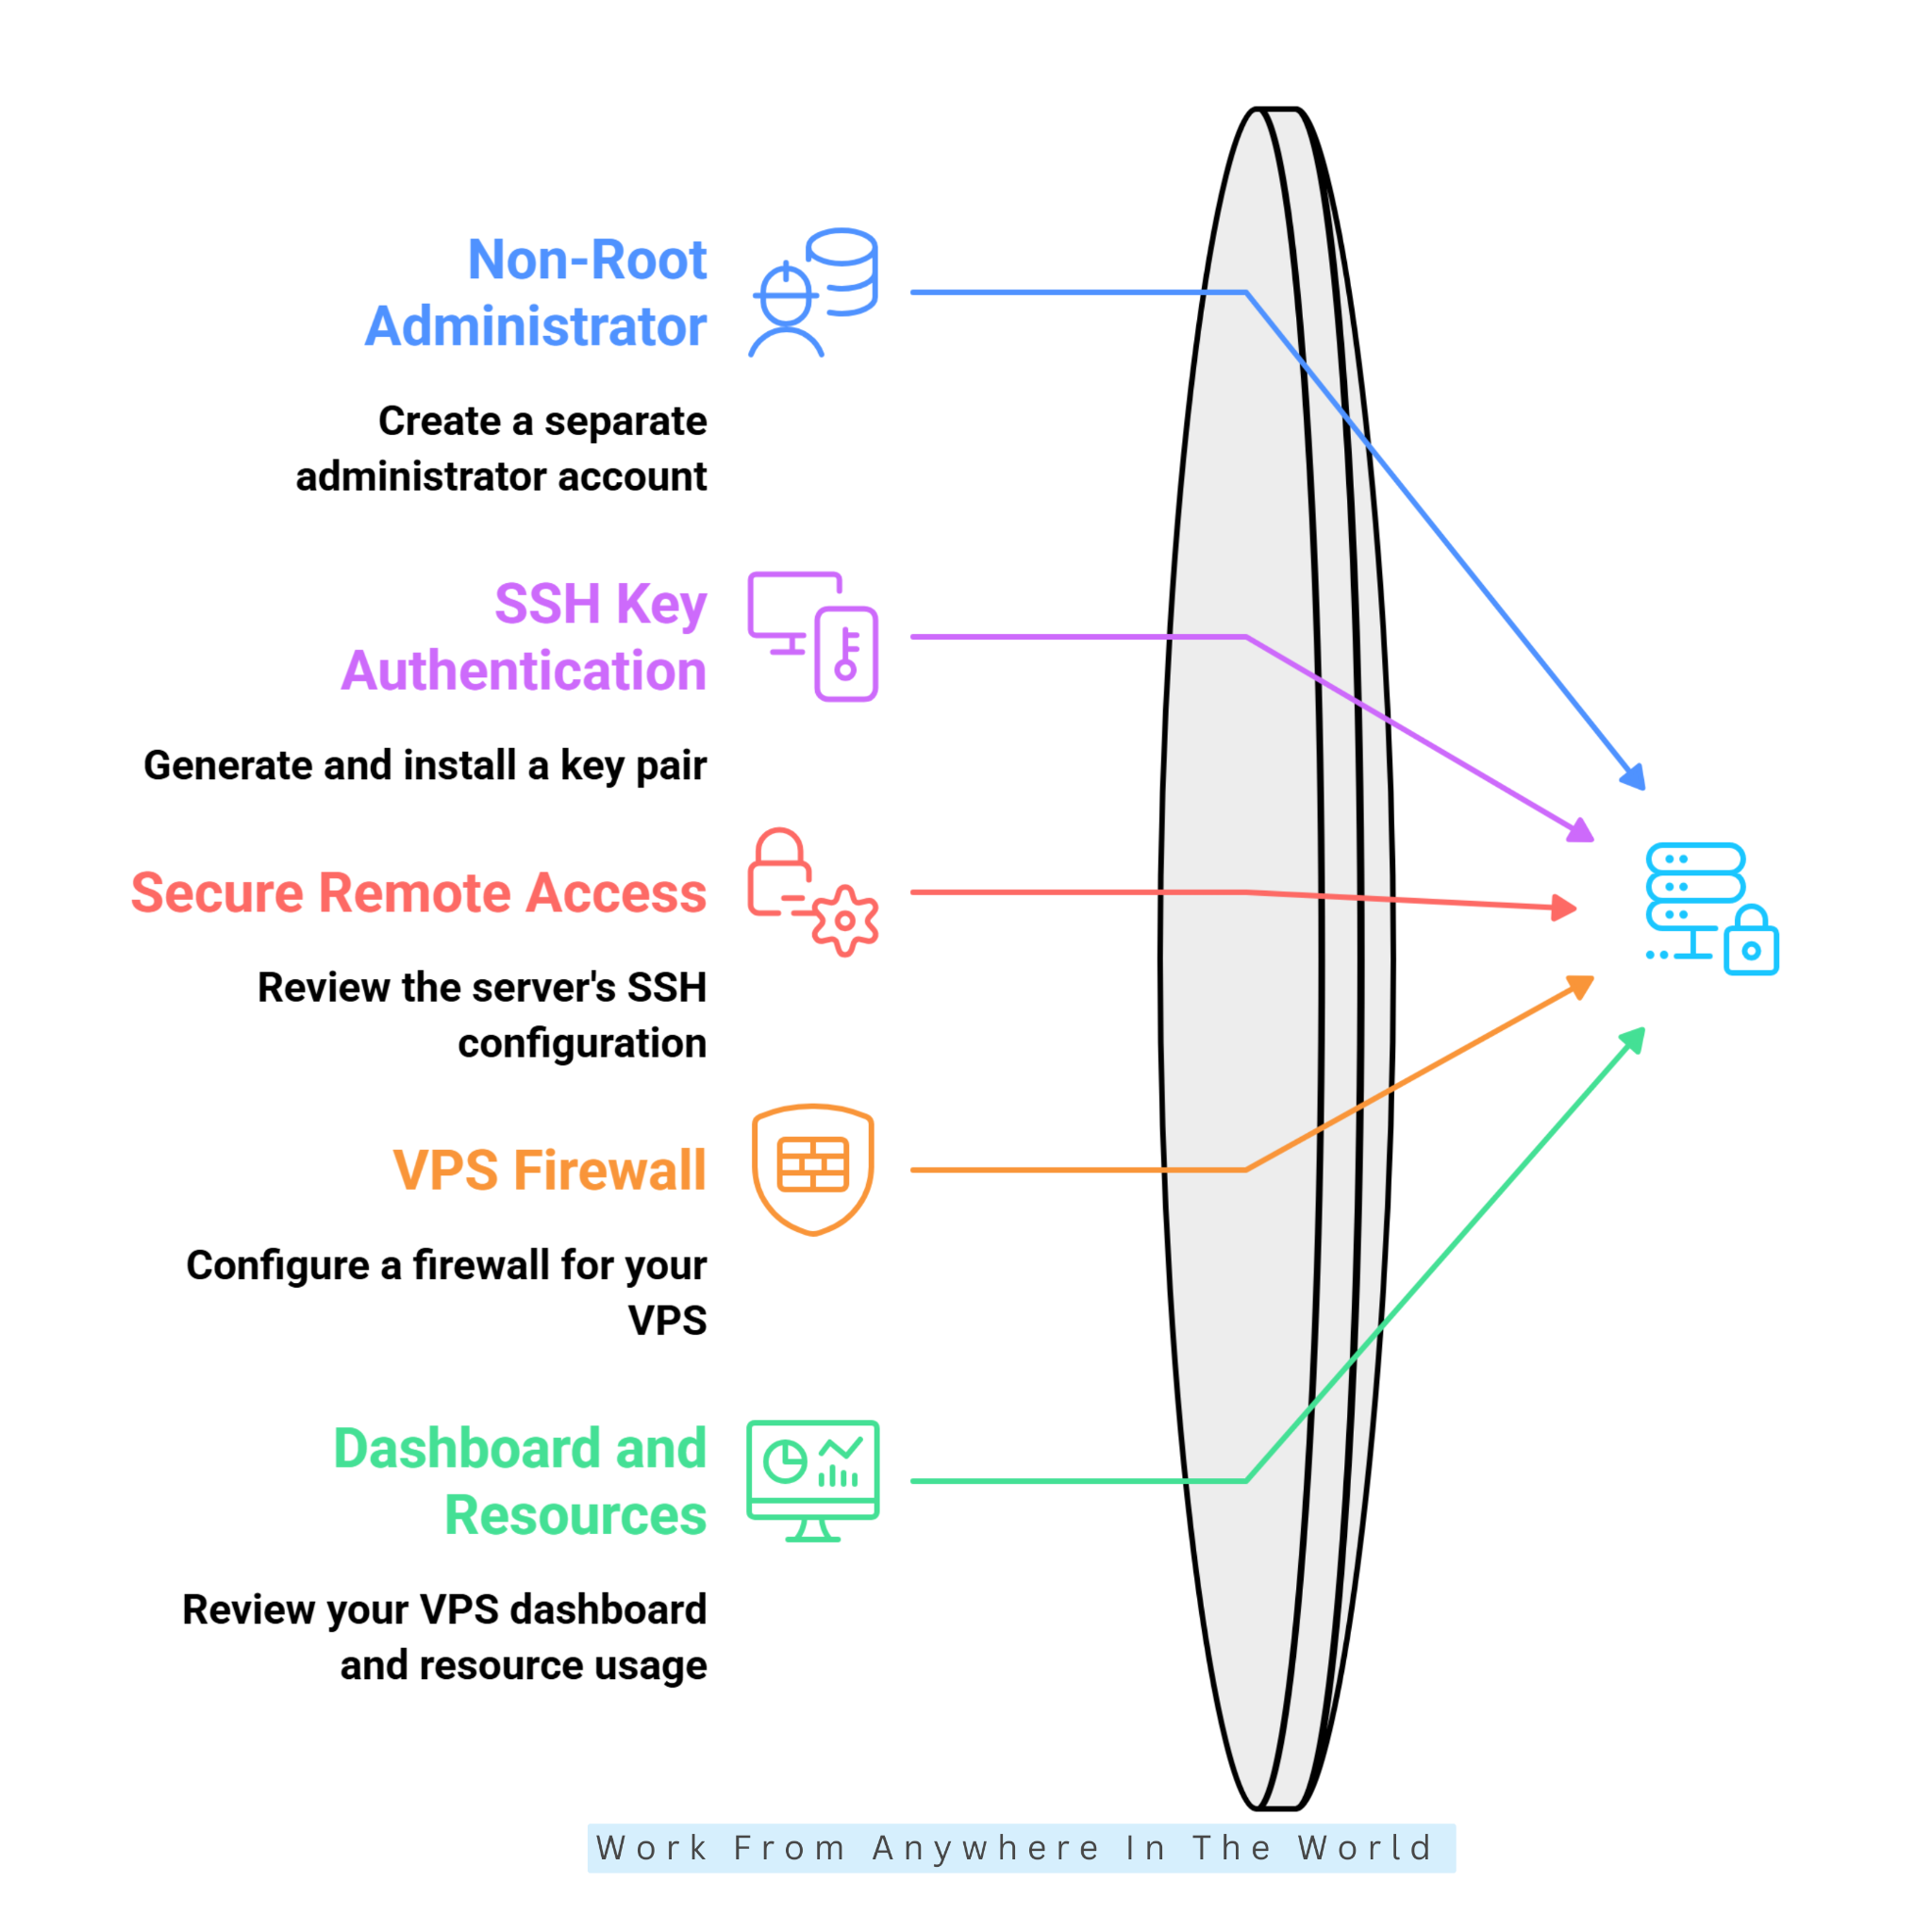
The root account has extensive privileges, allowing it to modify system files and change important server settings. Using it for everyday tasks increases the risk of accidental changes or security problems.
Creating a separate administrator account provides a safer approach to routine server management. On Ubuntu, begin by connecting to your VPS as root and entering the following command.
adduser siteadmin
Replace siteadmin with your preferred username and follow the prompts to create the account. Choose a strong password and complete any additional information requested during setup.
Next, grant the new account permission to perform administrative tasks using sudo.
usermod -aG sudo siteadmin
This command adds the account to the sudo group without removing its existing group memberships. The user can then perform authorized administrative tasks when necessary.
Keep your existing root session open while testing the new account. Confirm that you can log in and successfully use sudo before changing any root authentication settings.
7. Configure SSH Key Authentication
SSH keys provide a secure authentication method that does not rely solely on passwords. They use a private key stored on your computer and a matching public key installed on the server.
On your local computer, open a terminal and generate an SSH key pair using the following command.
ssh-keygen -t ed25519
Follow the prompts to choose a storage location and protect your private key with a strong passphrase. Keep this private key secure and never upload it to your website.
Next, install the public key for your new administrator account. On compatible macOS and Linux systems, you can use the following command.
ssh-copy-id siteadmin@YOUR_SERVER_IP
Replace the username and IP address with your actual server information. Windows users can also install the public key manually using supported SSH tools.
Open a new terminal and test whether you can connect using your SSH key. Confirm that authentication works reliably before considering changes to password-based access.
Once key-based login works correctly, disabling SSH password authentication can reduce exposure to automated password-guessing attempts. However, make this change only after confirming you have a working alternative.
Wealthy Affiliate – Mini Review
If you’ve ever thought about turning your blog, passion, or niche into an online business,
Wealthy Affiliate (WA) is one of the most beginner-friendly platforms I’ve used.
It combines step-by-step training, website hosting, AI-powered tools,
keyword research, and an active community all in one place.
What I like most is that you can start for free (no credit card needed), explore the platform,
test the tools, and connect with other entrepreneurs before upgrading.
WA isn’t a “get rich quick” scheme — success comes from consistent effort
and applying what you learn over time.
8. Secure Remote Access Before Disabling Root Login
After verifying your administrator account and SSH key, review your server’s SSH configuration. On Ubuntu, the main configuration file is commonly located at /etc/ssh/sshd_config.
You may configure SSH to prohibit direct root login and disable password authentication. These measures help reduce unnecessary exposure when secure administrator access is already established.
Before changing these settings, confirm that your new account can connect successfully using its SSH key. Keep your existing administrator session open throughout the process.
Check the SSH configuration for errors before applying changes. On systems using OpenSSH, the following command can help validate the configuration.
sudo sshd -t
A successful check normally produces no output. However, you should still verify the effective settings and follow your distribution’s instructions before reloading the SSH service.
Test a fresh connection before closing your existing session. This precaution helps prevent accidental lockouts caused by incorrect authentication settings.
Changing the default SSH port is optional and may reduce automated connection attempts. However, it does not replace strong authentication, regular updates, or proper firewall configuration.
9. Configure A Firewall For Your VPS
A firewall controls which incoming network connections can reach your server. On Ubuntu, Uncomplicated Firewall (UFW) provides a relatively simple way to manage these connections.
Before enabling the firewall, allow SSH access through the port your server actually uses. For a standard OpenSSH configuration, enter the following command.
sudo ufw allow OpenSSH
This allows the SSH application profile, normally using port 22. If you have changed your SSH port, create an appropriate rule for that port instead.
Next, allow standard HTTP traffic if you intend to host a publicly accessible website.
sudo ufw allow 80/tcp
Allow HTTPS traffic to support encrypted website connections.
sudo ufw allow 443/tcp
After verifying that the necessary access rules are configured, you can enable UFW.
sudo ufw enable
Review the firewall’s active rules using the following command.
sudo ufw status verbose
Confirm that your SSH connection remains available before closing the current terminal session. If Hostinger’s network-level firewall is enabled, ensure its rules also permit the required connections.
Keep unnecessary ports closed and expose additional services only when needed. A carefully configured firewall reduces the number of services accessible from the internet.
10. Review Your VPS Dashboard And Resource Usage
After completing the initial setup, return to your Hostinger VPS dashboard in hPanel. Familiarize yourself with server controls, operating system settings, resource monitoring, backups, and available security features.
These management tools provide useful information without requiring every task to be completed through terminal commands. They can also help you identify problems before they affect your website.
Regularly review CPU usage, memory consumption, storage capacity, and network activity. Understanding these measurements helps you determine whether your VPS has sufficient resources for its workload.
Sudden increases in resource usage may indicate growing traffic, a misconfigured application, or unexpected background activity. Investigating these changes early can help prevent performance problems.
Our guide to improving website speed explains additional ways to support a faster browsing experience. Server performance is only one part of maintaining a responsive website.
The monitoring information available depends on your hosting configuration and dashboard features. Make resource checks, security updates, and backup reviews part of your regular VPS maintenance routine.
How To Host A Website On Hostinger VPS
Once your VPS is configured and secured, the next step is preparing it to host your website. The following instructions demonstrate how to publish a basic static website using Nginx on Ubuntu.
1. Install A Web Server
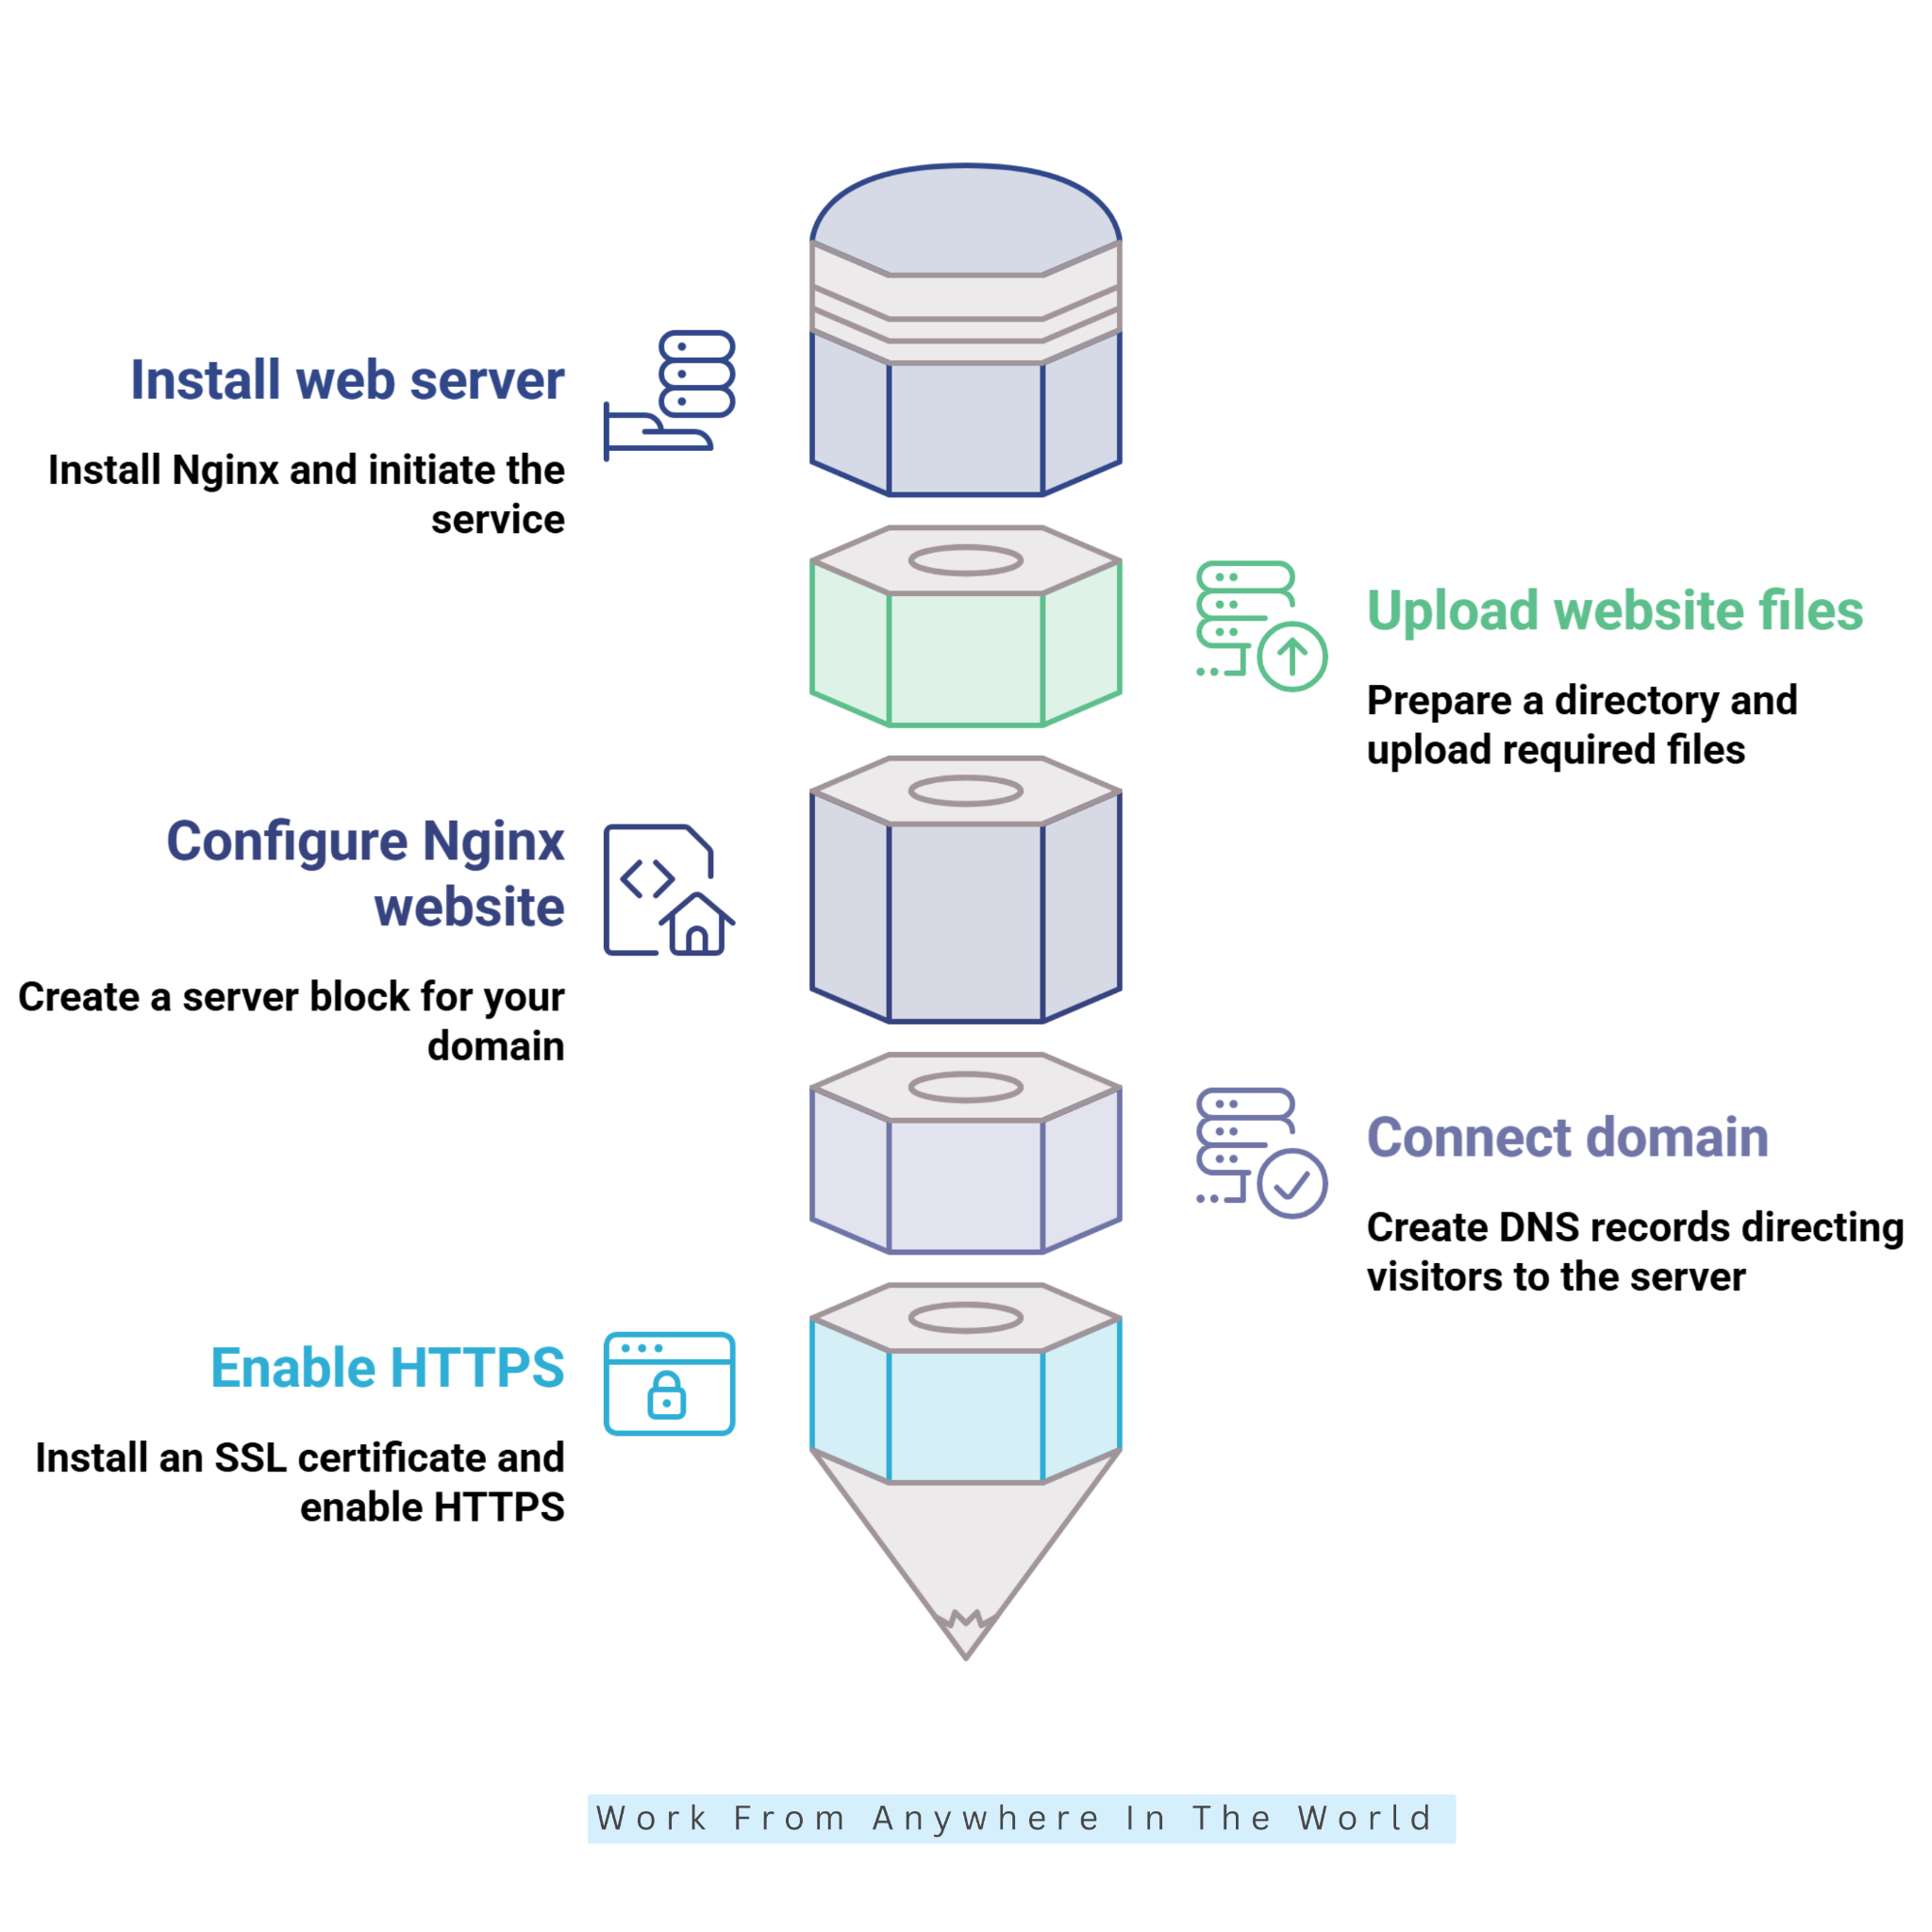
A web server receives requests from visitors and delivers website content to their browsers. Nginx is a popular option because it can serve static files efficiently and act as a reverse proxy for web applications.
First, update your package information on Ubuntu.
sudo apt update
Next, install Nginx using the following command.
sudo apt install nginx
After installation, enable Nginx and start the service automatically.
sudo systemctl enable --now nginx
Verify that the service is running correctly.
sudo systemctl status nginx
If your firewall allows HTTP traffic, enter your VPS IP address into a browser. The default Nginx welcome page should appear when the installation is working.
However, this only confirms that Nginx is responding to requests. Your website files, domain settings, and HTTPS configuration still need to be completed.
2. Upload Your Website Files
After installing Nginx, create a directory where your website files will be stored. This directory acts as the document root for your website.
For example, create a folder for your domain using the following command.
sudo mkdir -p /var/www/example.com
Next, assign ownership to your administrator account.
sudo chown -R siteadmin:siteadmin /var/www/example.com
Replace example.com and siteadmin with your actual domain and administrator username. Ensure the web server has appropriate read access without granting unnecessary write permissions.
Upload your HTML, CSS, JavaScript, images, and other website files using a secure transfer method. SFTP or SCP can transfer files through an encrypted SSH connection.
For a simple test, create an index.html file containing a basic webpage. This allows you to confirm that Nginx can deliver your website content correctly.
Larger websites and applications may require additional directories, dependencies, and deployment procedures. Always review file permissions carefully to avoid exposing sensitive information.
3. Configure Your Website In Nginx
Nginx uses server blocks to determine which website should respond to incoming requests. Each block identifies the domain name and the directory containing its website files.
On Ubuntu, create a configuration file for your domain in the /etc/nginx/sites-available/ directory. For example, you can open a file using the following command.
sudo nano /etc/nginx/sites-available/example.com
Add a basic configuration similar to this example:
server {
    listen 80;
    server_name example.com www.example.com;

    root /var/www/example.com;
    index index.html;

    location / {
        try_files $uri $uri/ =404;
    }
}
Replace the example domain names and document root with your actual information. This configuration tells Nginx where to find the website and how to handle basic file requests.
Next, enable the configuration by creating a symbolic link.
sudo ln -s /etc/nginx/sites-available/example.com /etc/nginx/sites-enabled/
Check your configuration for errors before applying any changes.
sudo nginx -t
If the configuration test succeeds, reload Nginx.
sudo systemctl reload nginx
If Nginx reports an error, correct the configuration before reloading the service. WordPress and other dynamic applications require additional settings beyond this basic static website example.
4. Connect Your Domain To The VPS
Your domain needs DNS records that direct visitors to your VPS. These records connect your website’s domain name with the server’s IP address.
Open the DNS management area provided by your domain registrar or DNS hosting provider. Create an A record for your root domain and point it to your VPS IPv4 address.
To support the www version, you can create a CNAME record pointing to the root domain. Follow your DNS provider’s instructions when configuring these records.
DNS changes may take time to propagate across different networks. Wait for the updated records to become available before troubleshooting website connection problems.
If your VPS supports IPv6, you may also configure an AAAA record. Only add this record when the corresponding IPv6 address is correctly assigned and accessible.
Once your DNS records resolve to the correct server, test both versions of your domain. Confirm that visitors can reach the intended website before proceeding with HTTPS configuration.
5. Install An SSL Certificate And Enable HTTPS
HTTPS encrypts information exchanged between your website and its visitors. Installing a valid SSL certificate helps protect these connections and supports a more trustworthy browsing experience.
For an Ubuntu VPS running Nginx, Certbot can help obtain and configure a free Let’s Encrypt certificate. Follow the official Certbot installation instructions for your operating system and web server.
Before requesting a certificate, confirm that your domain points to the correct VPS. Ensure the necessary web ports are accessible and that Nginx is responding properly.
After installing Certbot and its Nginx integration, a typical certificate request uses the following command.
sudo certbot --nginx -d example.com -d www.example.com
Replace the example domain names with the domains you actually control. Include the www version only when its DNS records are configured correctly.
Certbot can help configure Nginx to use the certificate and enable HTTPS. Follow the prompts carefully and review the resulting configuration.
After installation, open your website using https:// and confirm that the certificate is valid. Check that both domain versions work as intended.
Finally, verify that automatic certificate renewal is configured and functioning correctly. If you use a hosting control panel or reverse proxy, follow its recommended certificate management process to avoid conflicting configurations.
How To Install WordPress On Hostinger VPS Automatically
Hostinger offers a preconfigured WordPress VPS template that simplifies installation. Instead of manually installing WordPress, PHP, a database, and a web server, you can deploy a prepared environment through your VPS dashboard.
Step 1: Log In To Hostinger And Open Your VPS
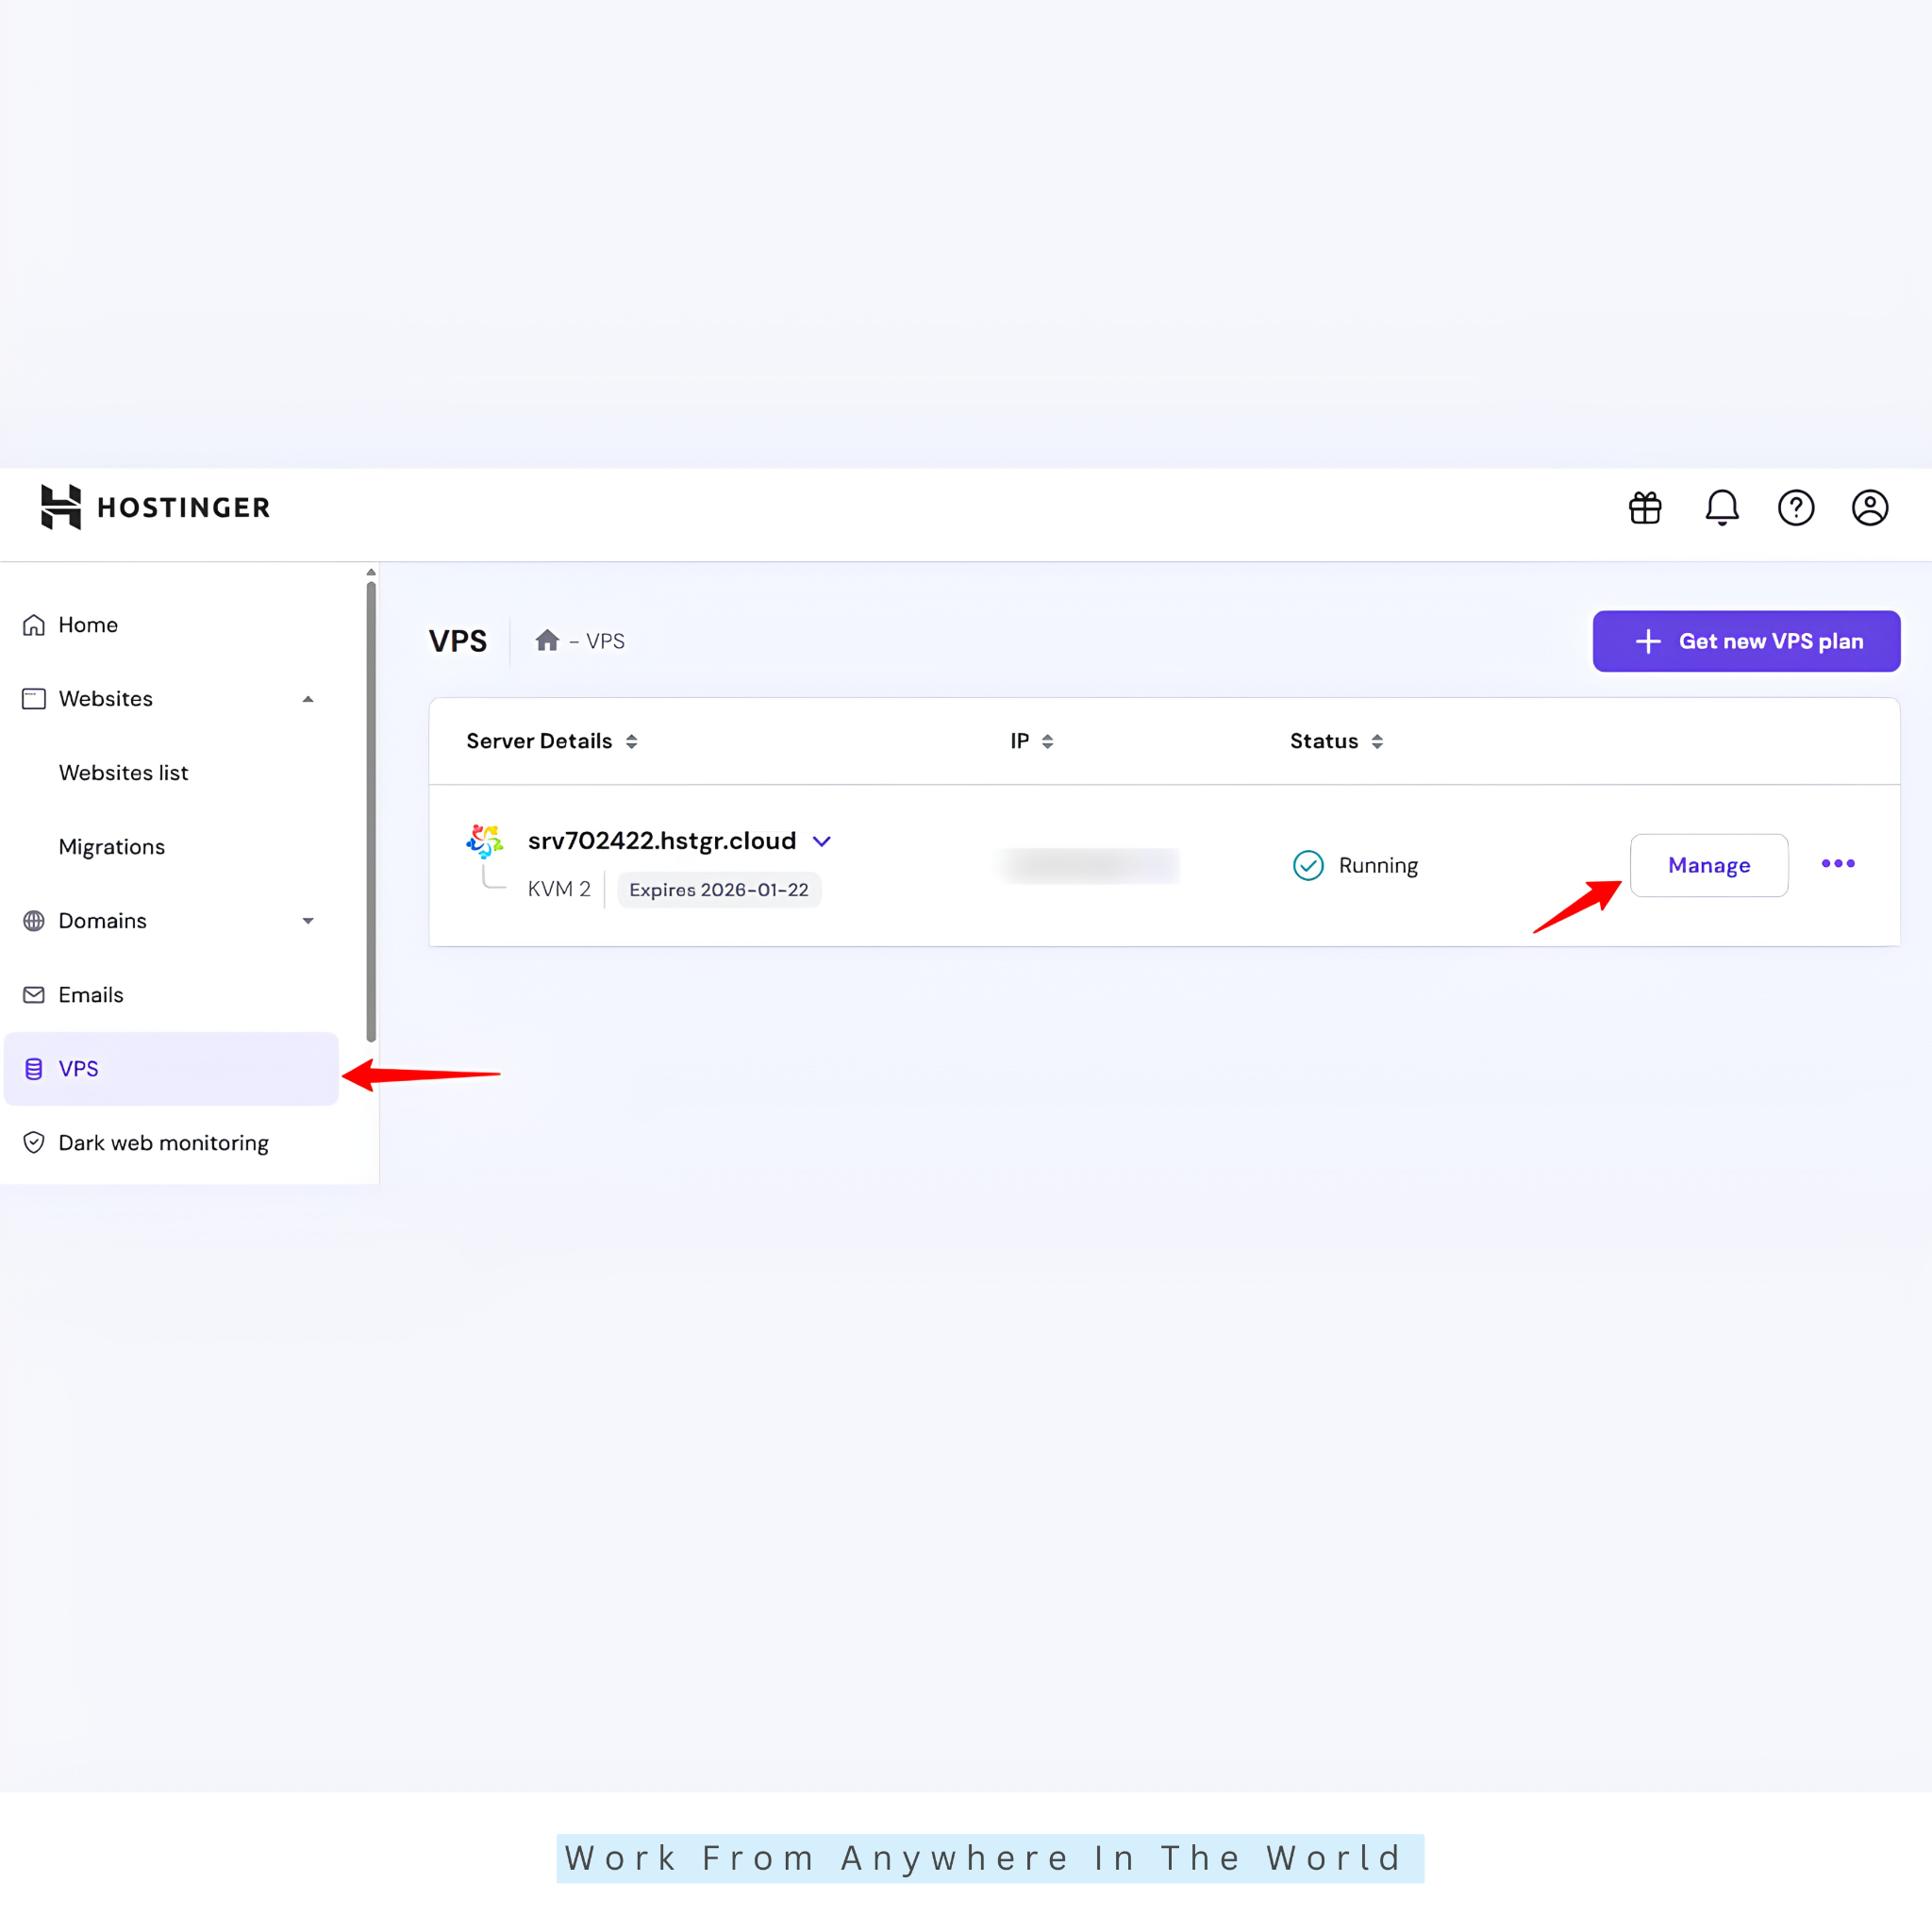
Start by signing in to your Hostinger account and opening the VPS section of your dashboard. Select the server you want to use and click Manage to access its settings.
If you’re configuring a new VPS, follow the initial setup instructions and select an available operating system or application template. Hostinger provides several templates with applications already installed.
Before modifying an existing VPS, review its contents and download any important backups. Changing the operating system permanently erases existing server data, including website files and configurations.
Step 2: Select The WordPress VPS Template
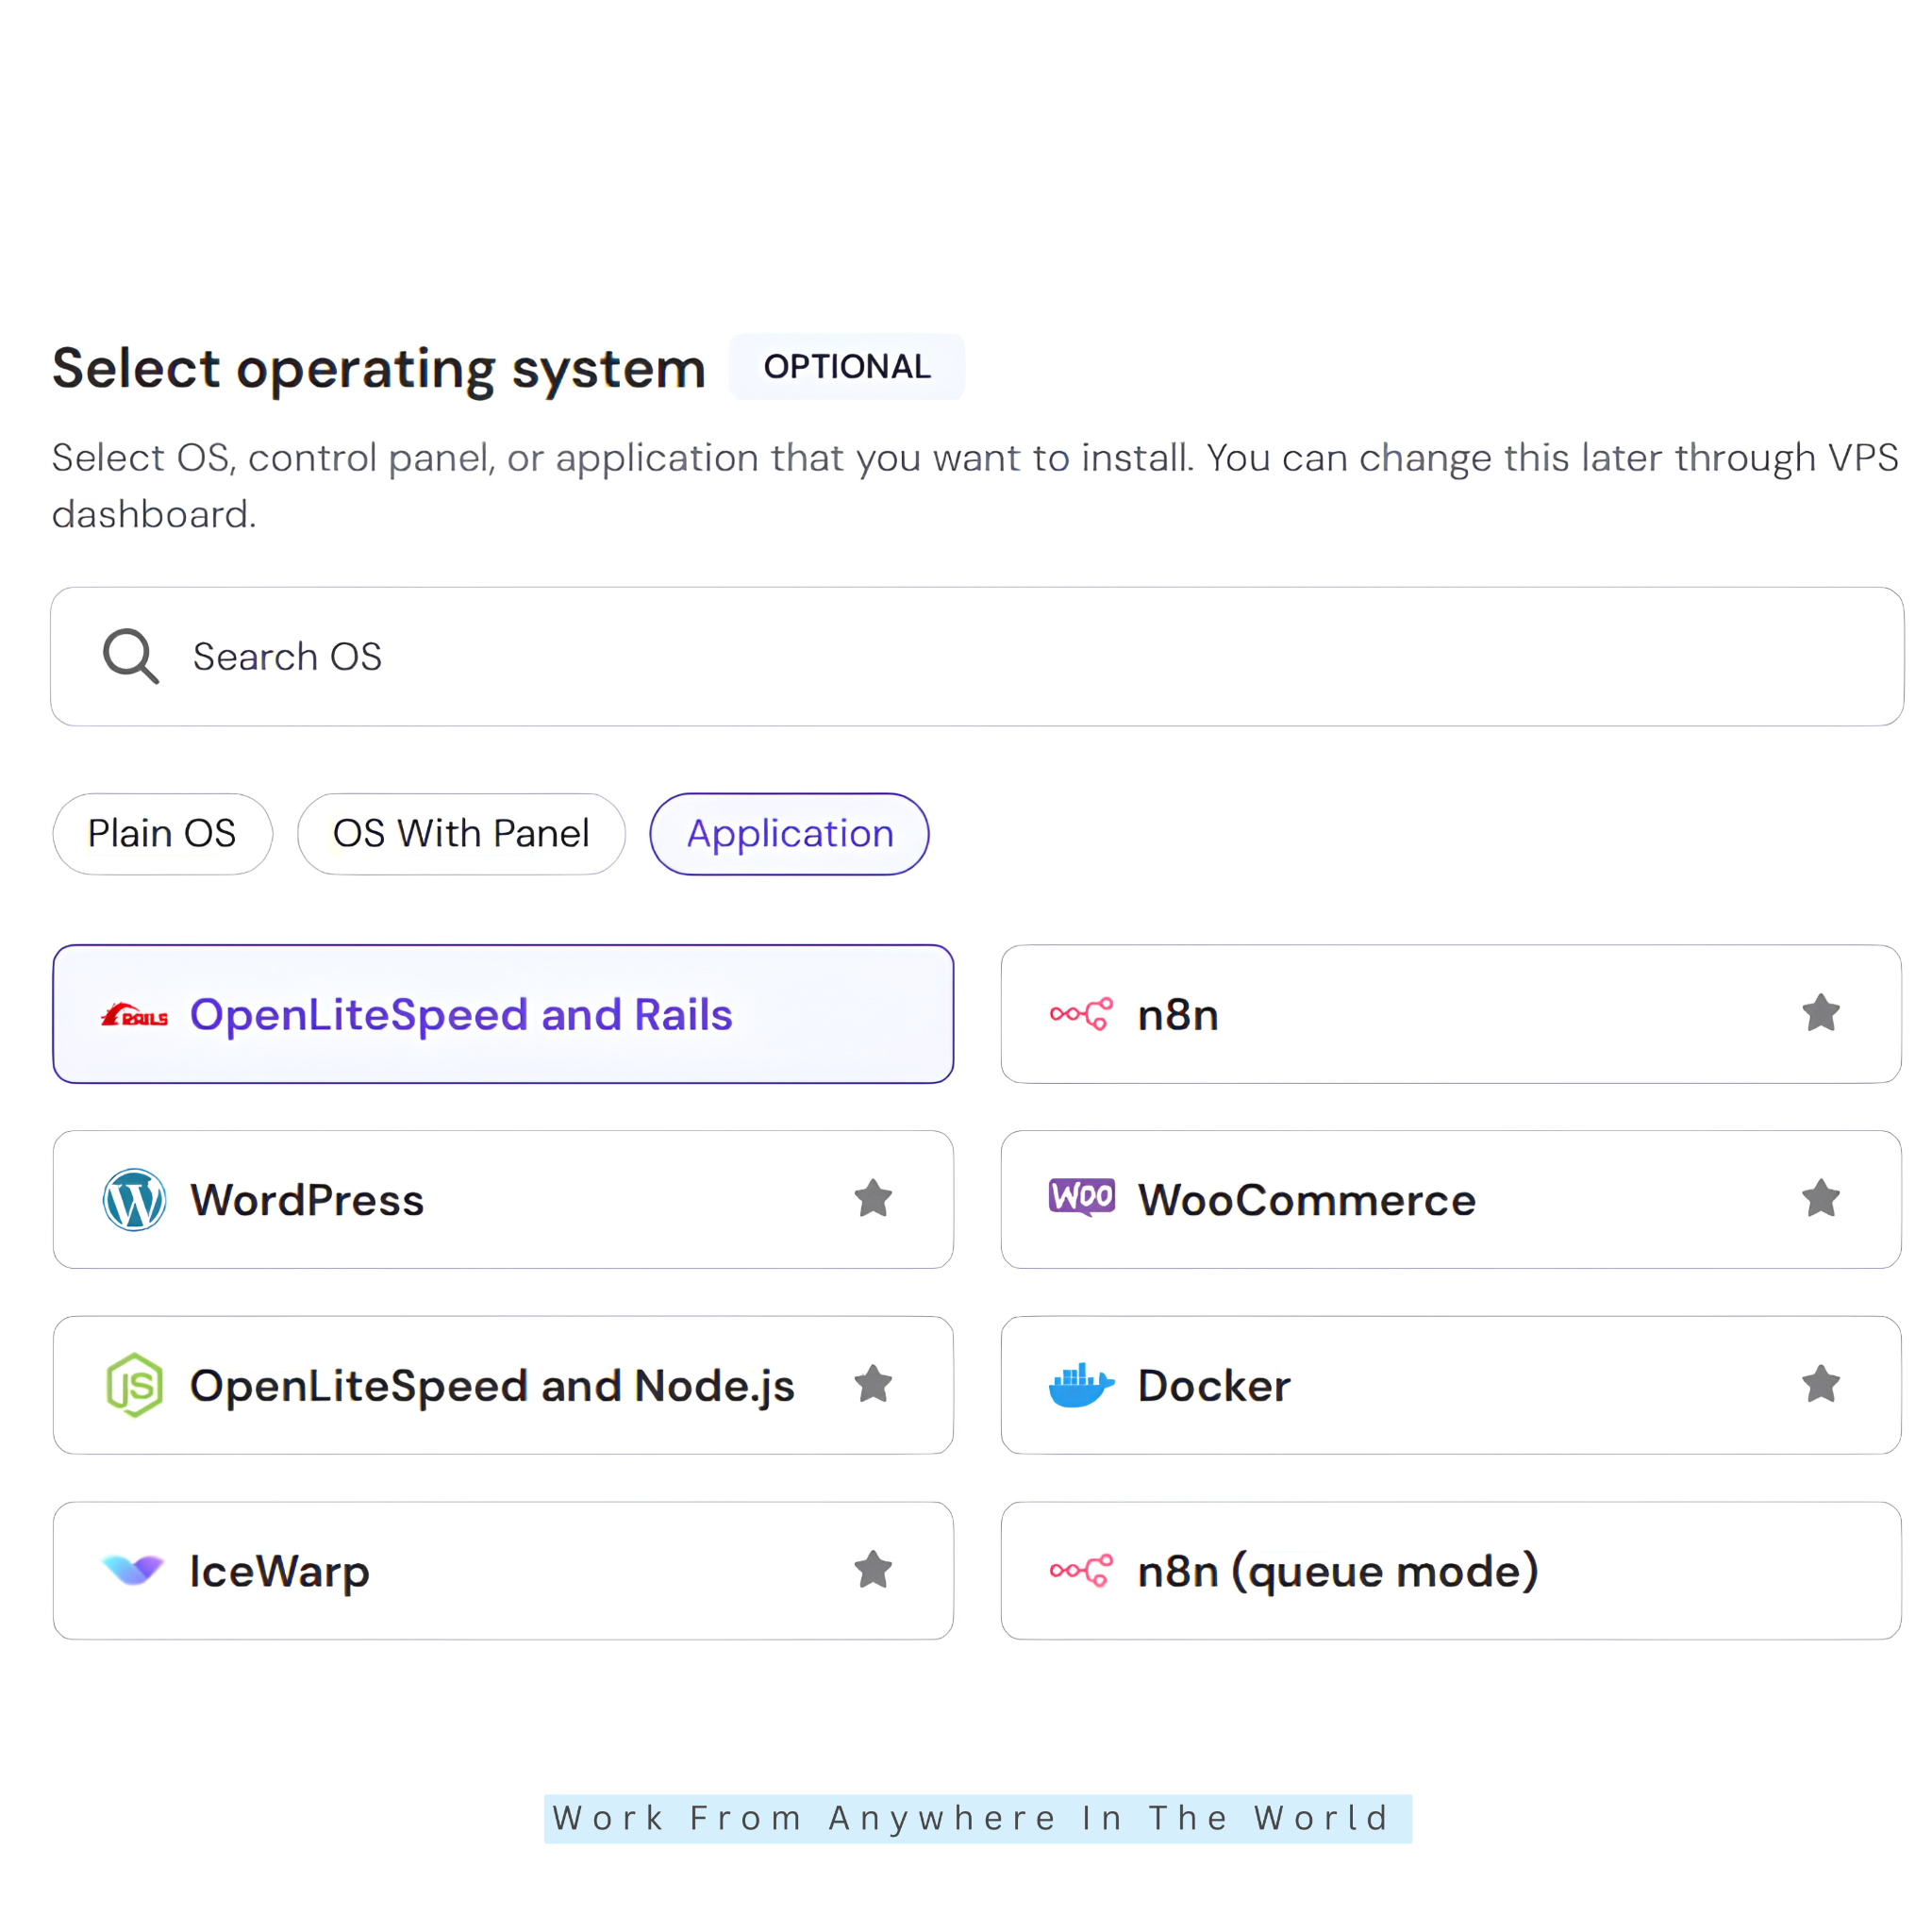
In your VPS dashboard, navigate to OS & Panel → Operating System. Open the Applications section and locate the available WordPress template.
Hostinger offers an Ubuntu 24.04 64-bit WordPress template with a preconfigured hosting environment. Review its specifications and confirm that it meets your website’s requirements.
Select the template and click Change OS to begin the installation process. Carefully read the confirmation message explaining that existing VPS data will be deleted.
After acknowledging the warning, follow the prompts to create the required panel password and confirm installation. Save your credentials securely for future access.
For additional guidance, consult Hostinger’s official WordPress VPS template instructions.
Step 3: Complete The Installation And Access WordPress
After confirming your selection, wait for Hostinger to finish installing the WordPress environment. Installation time may vary depending on server conditions and the selected template.
Once your VPS is ready, open a browser and visit the WordPress administration address associated with your server.
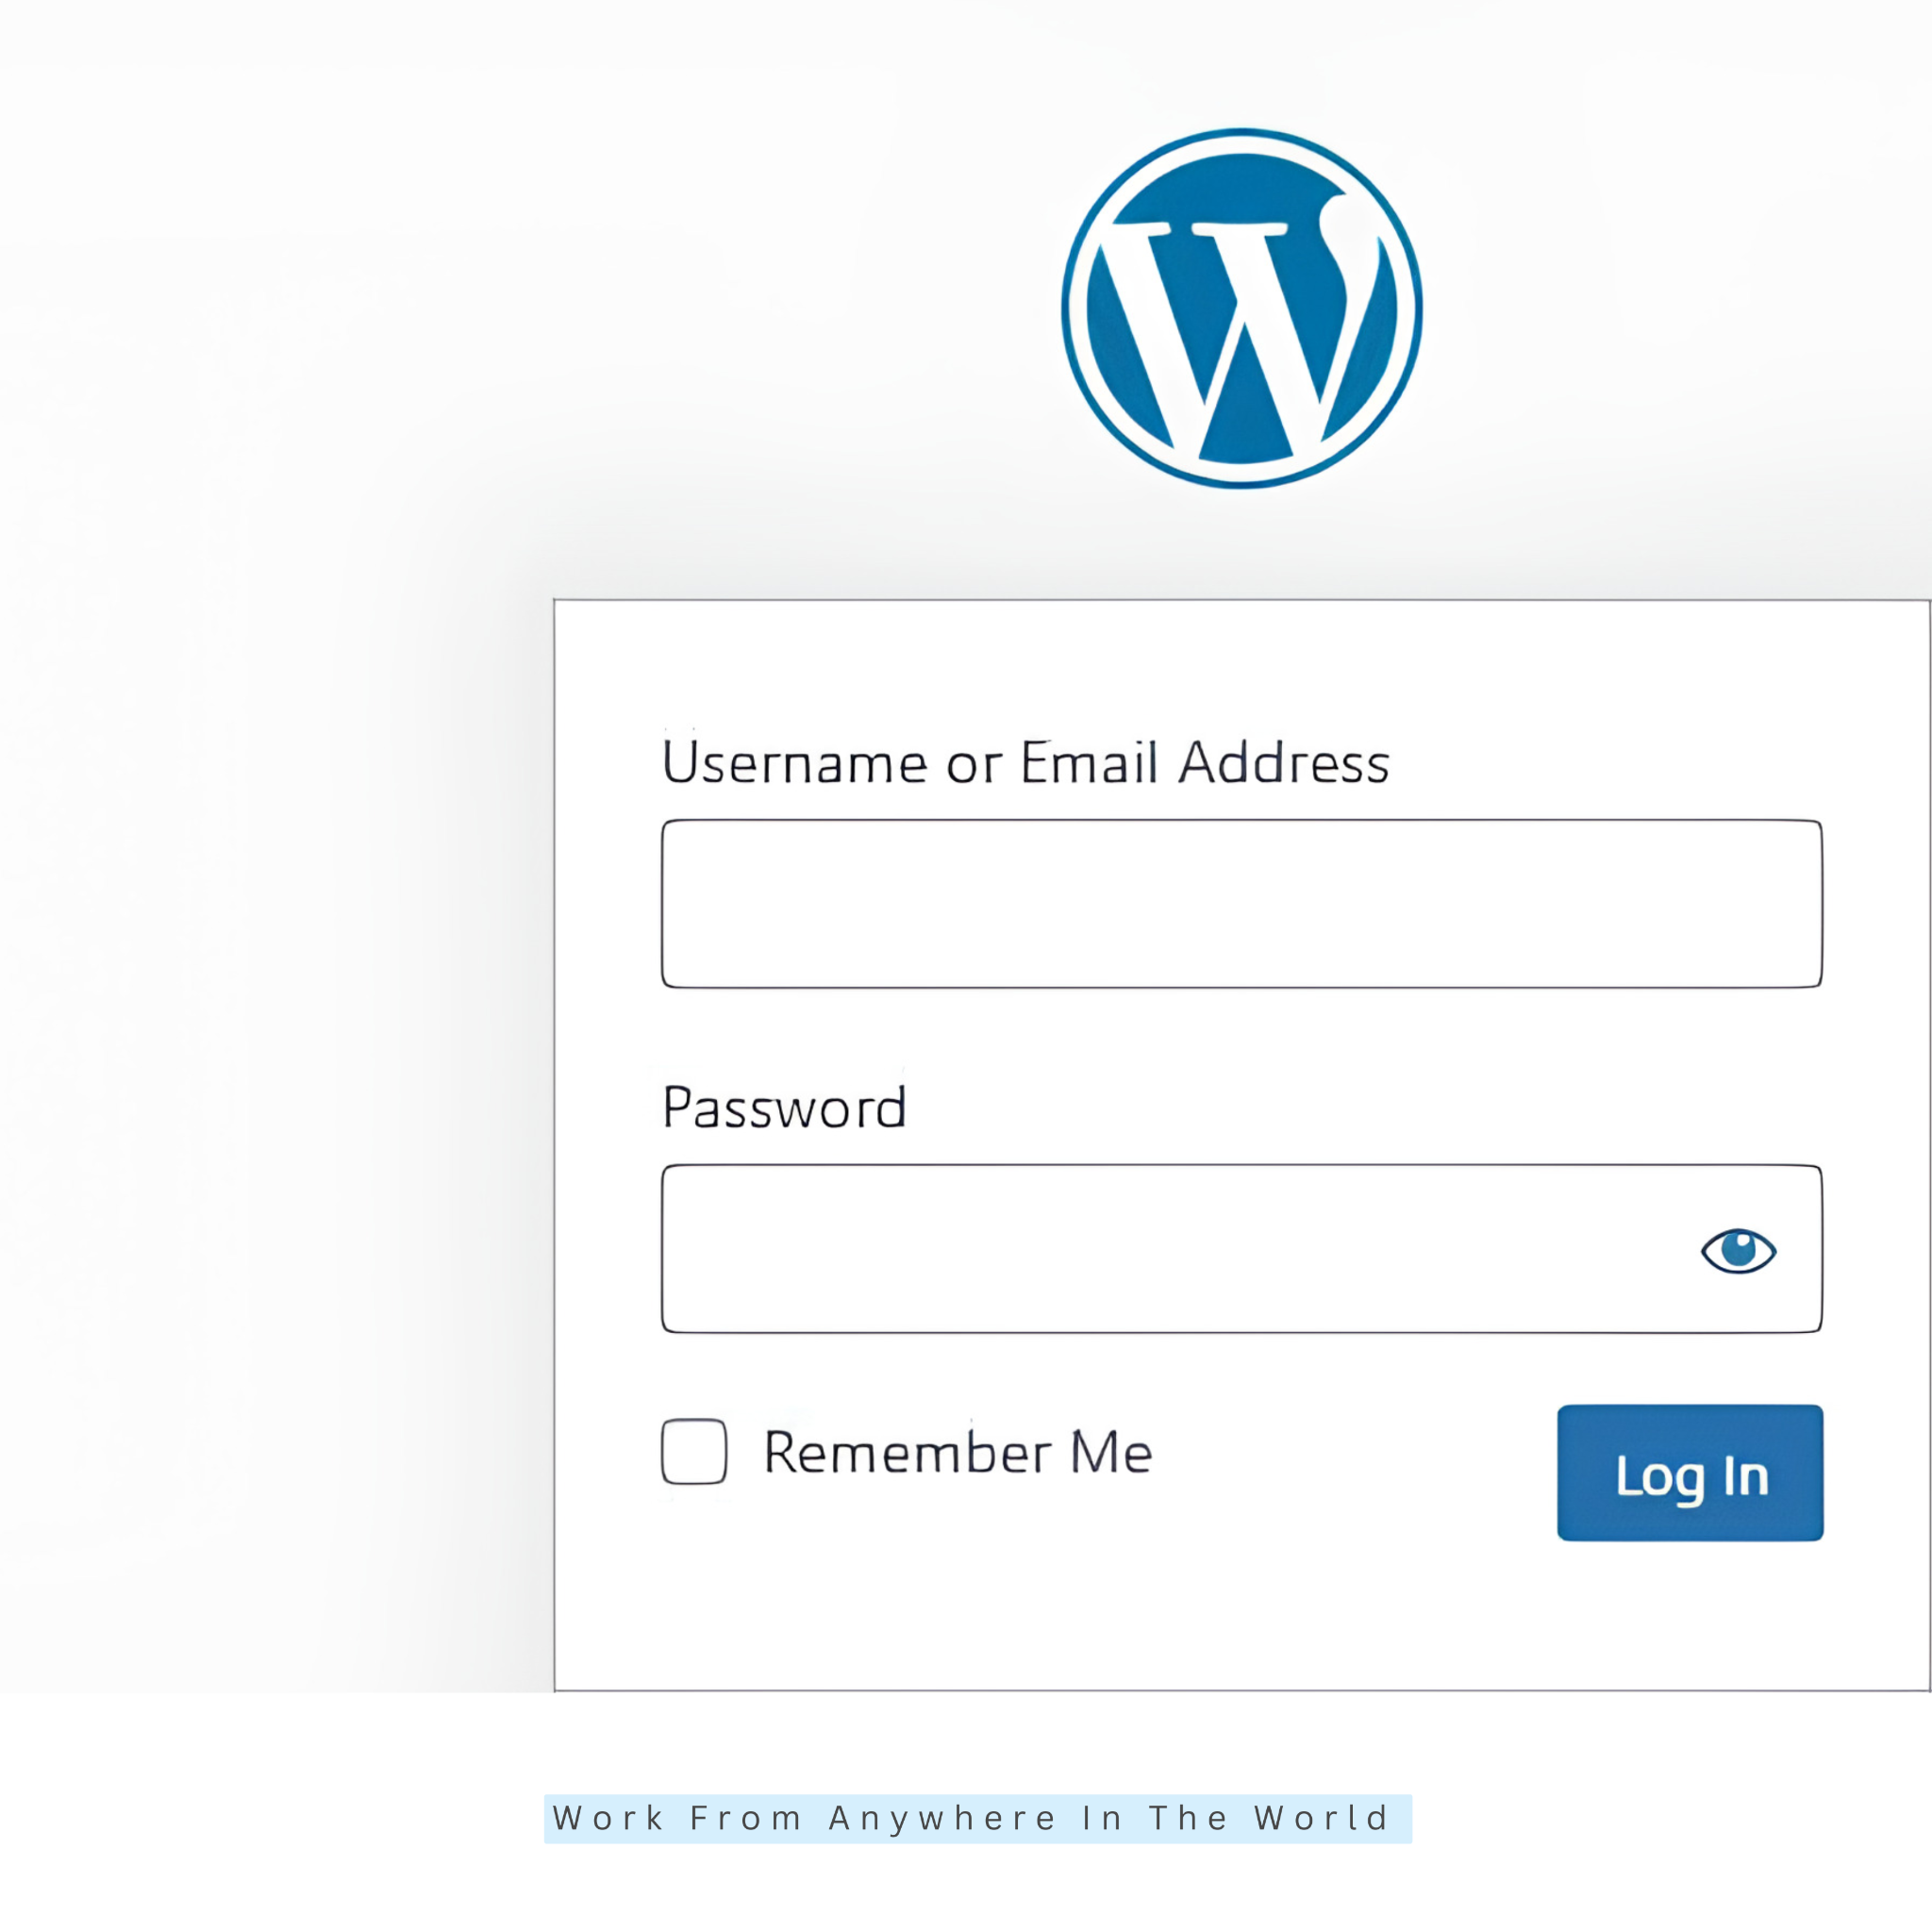
http://your-vps-hostname/wp-admin
Replace your-vps-hostname with your actual VPS hostname. Hostinger’s documentation identifies the default administrator email format as admin@your-vps-hostname.
Use the password you created during template installation to access your WordPress dashboard. If the hostname does not resolve, check the server’s hostname and DNS configuration.
The WordPress template also includes CloudPanel, which manages the Nginx hosting environment. This means you generally do not need to repeat the manual web server installation described earlier.
Step 4: Connect Your Domain And Configure WordPress
After accessing WordPress, connect your domain by pointing its DNS records to your VPS IP address. Follow Hostinger’s instructions for updating the server hostname to match your domain.
Allow time for DNS changes to take effect before troubleshooting connection problems. Once your domain resolves correctly, verify that the website and administration area are accessible.
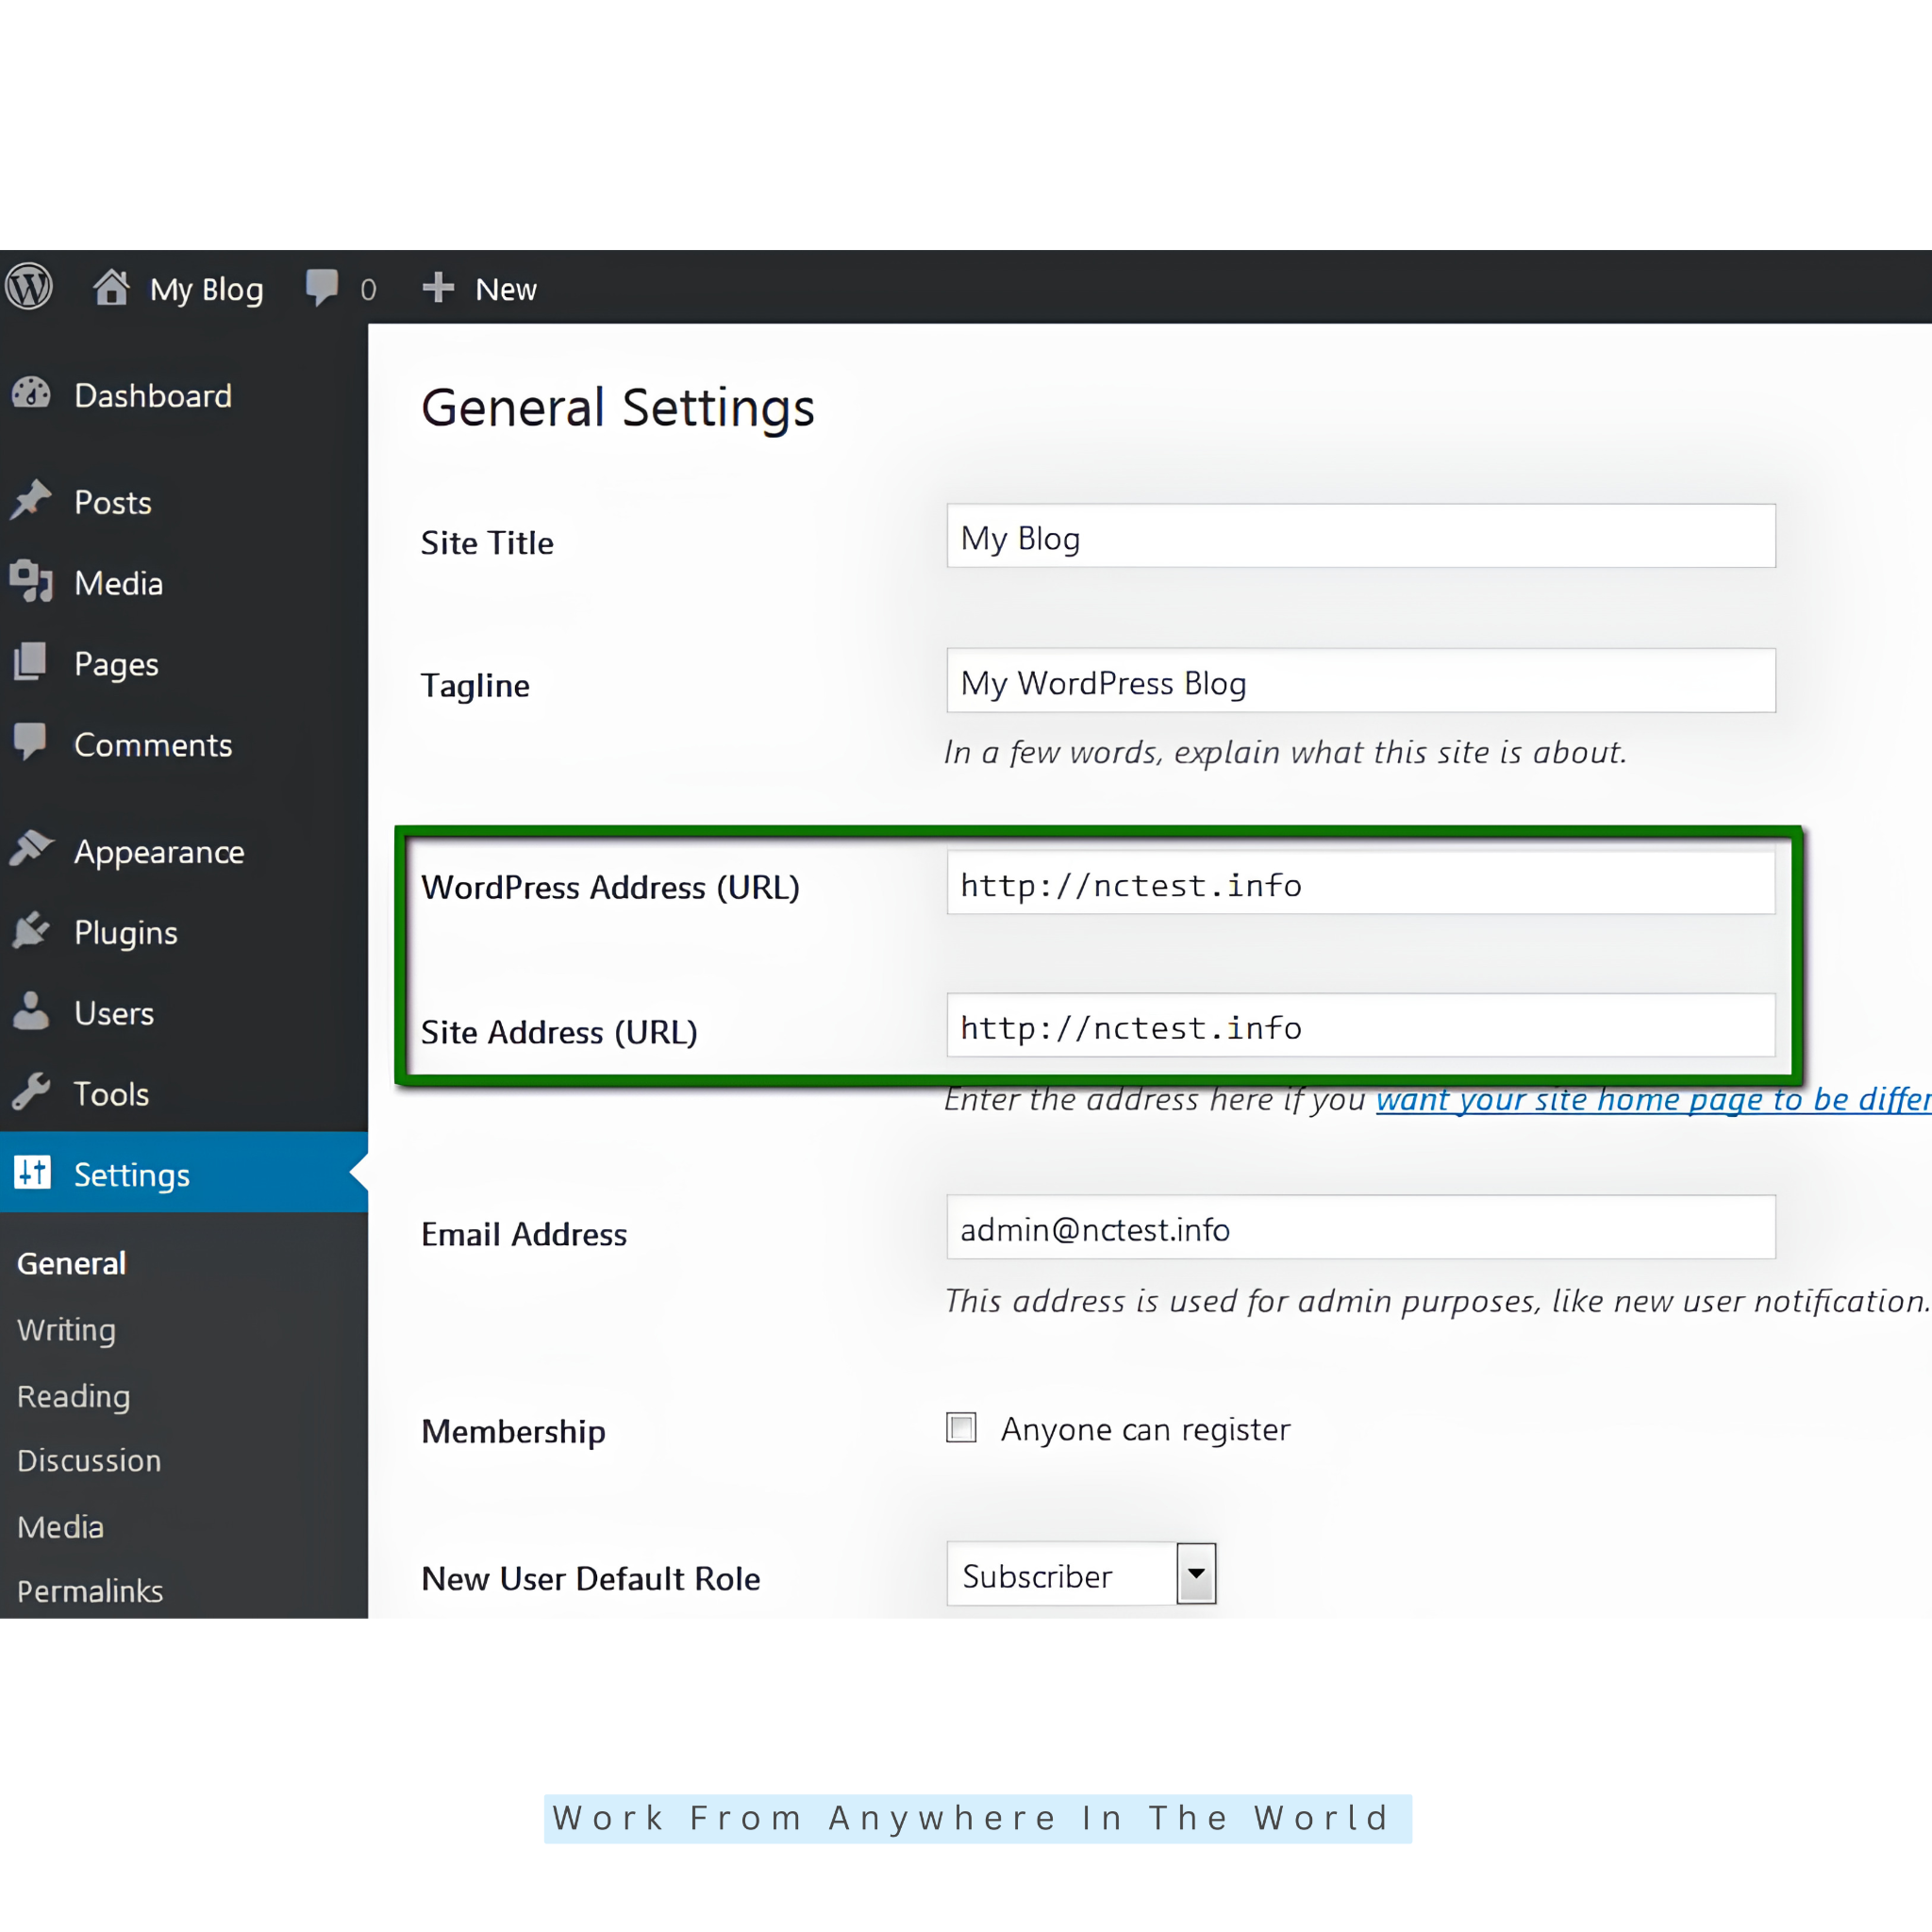
In WordPress, navigate to Settings → General to configure your website title, tagline, and other basic settings. Review the WordPress Address and Site Address carefully before changing them.
Next, open Settings → Permalinks and choose a suitable URL structure, such as Post name. This creates readable page addresses that are useful for visitors and search engines.
You can also explore our guide to the best WordPress hosting services if you’re comparing VPS hosting with other WordPress hosting options.
Before publishing, configure a valid SSL certificate through the appropriate hosting tools and enable HTTPS. Test your homepage, WordPress login, and important pages to ensure everything works correctly.
Frequently Asked Questions
Q1: Can I Host WordPress On Hostinger VPS?
Yes. Hostinger offers a preconfigured WordPress VPS template that simplifies installation. You can also install WordPress manually if you prefer greater control over your hosting environment.
Whichever method you choose, configure HTTPS, maintain regular backups, and keep your software updated. These practices help protect your website and maintain reliable performance.
Q2: Do I Need SSH To Manage My VPS?
SSH is commonly used to manage Linux servers because it provides secure remote access. It allows you to install software, update applications, and modify server configurations.
However, Hostinger also offers a browser-based console and compatible control panels. These tools can simplify certain management tasks without requiring a separate SSH application.
Q3: How Do I Connect My Domain To Hostinger VPS?
Open your domain provider’s DNS settings and point the appropriate records to your VPS IP address. You must also configure your web server to recognize your domain.
DNS changes may take time to become available across different networks. Once your domain works correctly, install an SSL certificate to enable secure HTTPS connections.
Q4: Is Hostinger VPS Hosting Suitable For Beginners?
Hostinger VPS hosting can work for beginners who are willing to learn basic server administration. However, it requires more technical involvement than traditional shared or managed hosting.
Beginners should become familiar with SSH, software updates, security settings, and backups. Starting with a preconfigured application template can make the learning process easier.
Q5: Can I Upgrade My Hostinger VPS As My Website Grows?
Hostinger offers VPS plans with different resource allocations, allowing you to choose a configuration that suits your needs. Upgrading may provide additional processing power, memory, and storage.
Before upgrading, review your current resource usage and the available plan options. Maintain a recent backup and check whether the upgrade requires any additional configuration.
Q6: How Can I Keep My Hostinger VPS Secure?
Start by keeping your operating system and installed applications updated. Use SSH key authentication, a properly configured firewall, and a separate administrator account for routine tasks.
Regular backups and resource monitoring are equally important. Review access permissions, remove unnecessary services, and periodically check your server for unusual activity.
Conclusion
This Hostinger VPS tutorial provides a practical foundation for setting up, securing, and managing your virtual server. With the right configuration, you can create a flexible hosting environment for websites and online projects.
Begin with essential security measures, including SSH authentication, firewall protection, and regular software updates. Then configure your website, connect your domain, and enable HTTPS to protect visitors.
Reliable backups and ongoing monitoring are equally important for maintaining server performance. As your confidence grows, you can gradually explore more advanced features and customize your hosting environment.
Managing a VPS takes patience and practice, especially when you’re just starting. By following these steps and maintaining your server regularly, you can build a more secure and dependable foundation for your online projects.
I trust you enjoyed this Hostinger VPS Tutorial: 10 Steps to Secure Your Server. Please stay tuned for more insightful blogs on affiliate marketing, online business, and working from anywhere in the world.
Take care!
— JeannetteZ 🌍✨
💬 Your Opinion Is Important To Me
Do you have thoughts, ideas, or questions? I’d love to hear from you. Please leave your comments below or email me directly at Jeannette@WorkFromAnywhereInTheWorld.com.
📚 More Work From Anywhere Reads
🚀 Ready to Build a Business You Can Run from Home
Or from Anywhere in the World?
Imagine earning income on your terms — from home, a cozy café, or wherever life takes you.
With the right tools, training, and community support, it’s entirely possible.
Start your own online business for free — no credit card needed.
Disclosure
This post may contain affiliate links. As an Amazon Associate and participant in other affiliate programs, I earn from qualifying purchases at no extra cost to you. Please read my full affiliate disclosure.