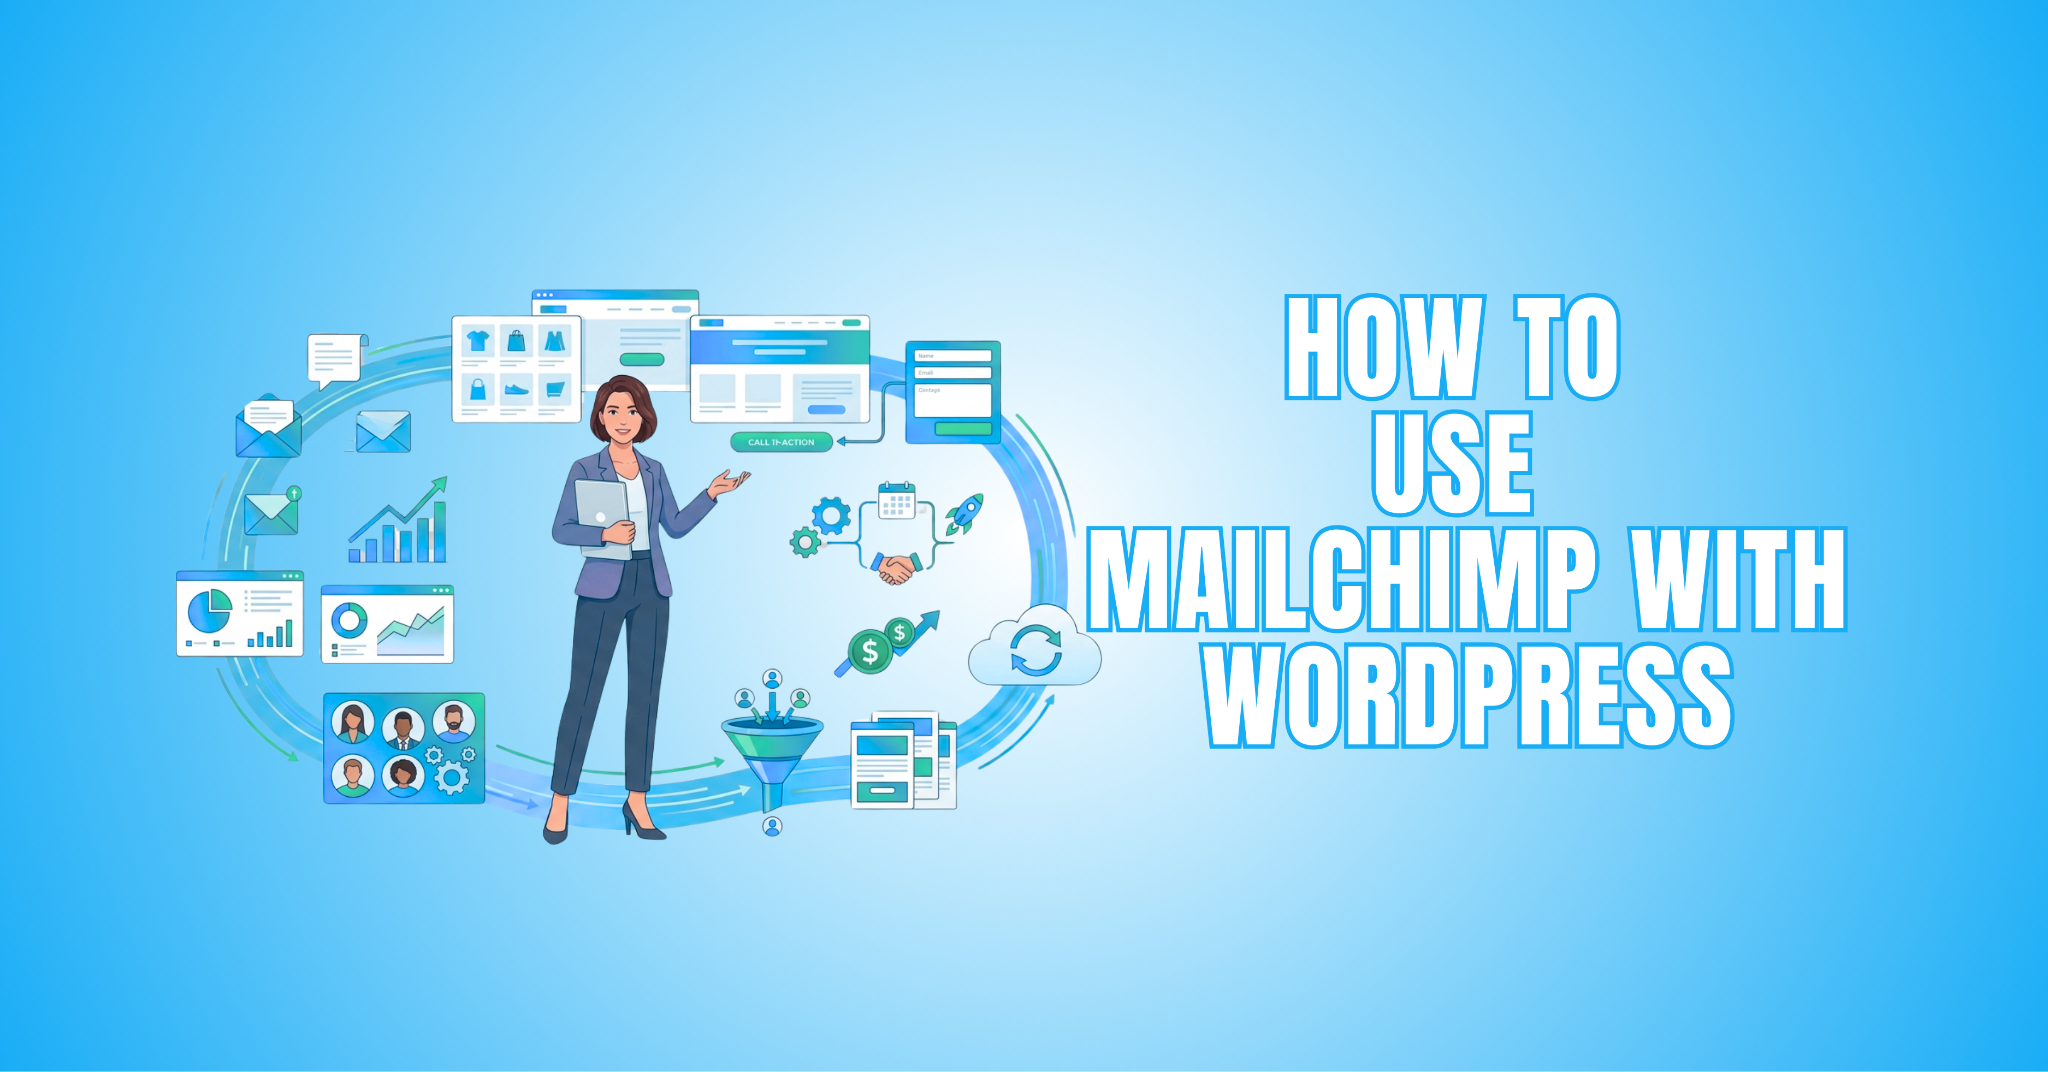
How To Use Mailchimp With WordPress: A 9-Step Tutorial
This guide walks through the entire process, from setting up an account to creating campaigns, automating emails, analyzing reports, and improving results over time. If you’d like a broader overview of the platform, see How To Work With Mailchimp.
Mailchimp integrates with WordPress through plugins that automatically sync subscriber information. This reduces manual work while helping you keep your email list organized.
Once everything is connected, you can create signup forms, automate emails, and build stronger relationships with your audience. These tools also help save time and improve communication.
This step-by-step guide shows you how to connect Mailchimp with WordPress and use its key features effectively. Each step builds on the previous one to help you create a reliable email marketing system.
Benefits Of Using Mailchimp With WordPress
Connecting Mailchimp with WordPress helps simplify email marketing and subscriber management. The integration allows both platforms to work together automatically, reducing manual tasks.
Whether you run a blog, an online store, or a business website, Mailchimp makes it easier to collect subscribers and communicate with your audience. Everything can be managed from one connected system.
The integration also supports automation, helping you send timely emails while keeping your contact lists organized. This saves time and creates a more consistent experience for your subscribers.
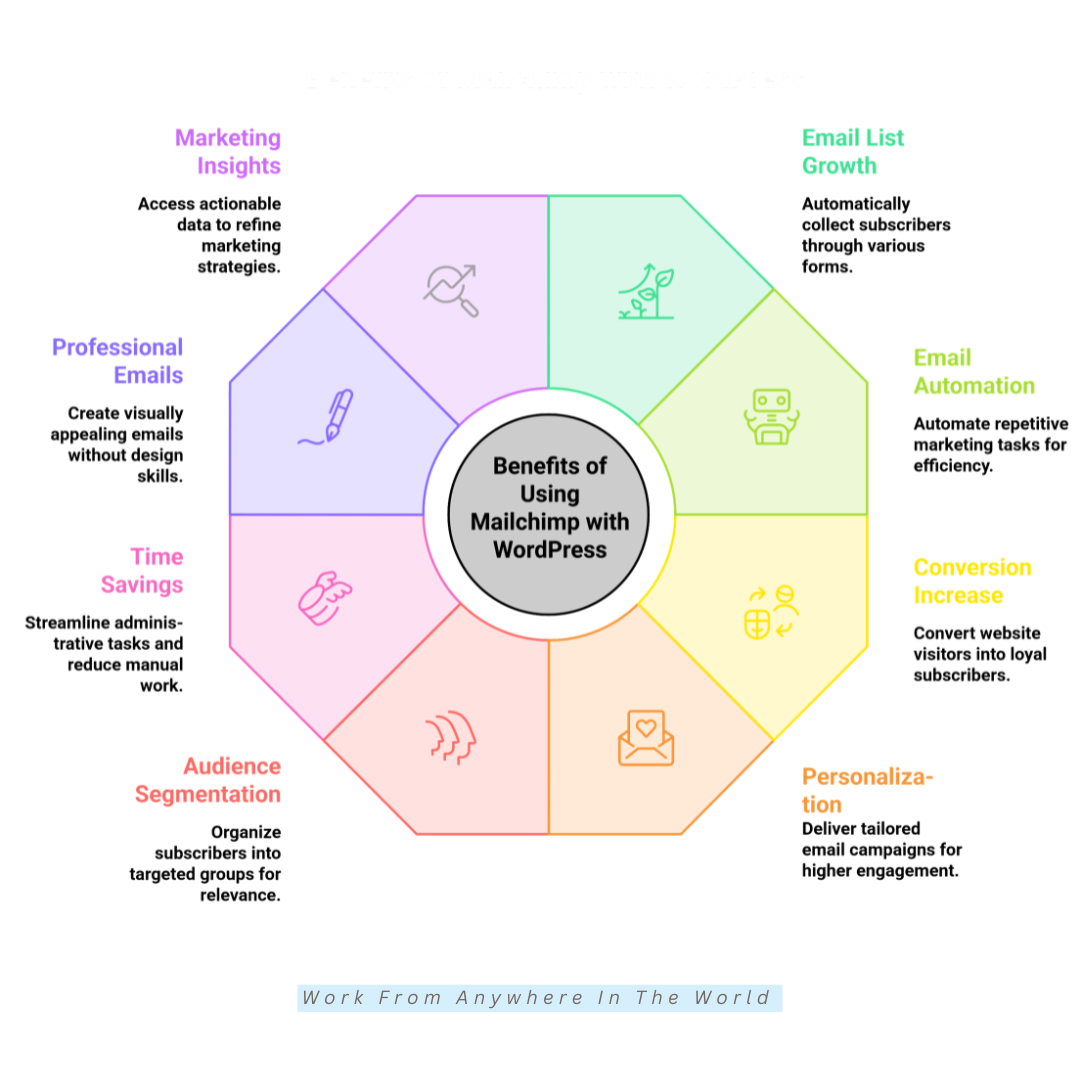
The following benefits show how using Mailchimp with WordPress can improve your email marketing strategy. They also highlight why this integration has become a popular choice for website owners.
1. Grow Your Email List Automatically
Connecting Mailchimp with WordPress allows signup forms, popups, landing pages, and contact forms to automatically collect subscribers. This reduces manual work and keeps your email list up to date.
New subscribers are added directly to your Mailchimp audience, making list management more efficient. You can spend less time importing contacts and more time creating valuable campaigns.
An automatically growing email list becomes a valuable business asset over time. It helps you reach more people, strengthen customer relationships, and support future marketing campaigns.
2. Automate Your Email Marketing
Mailchimp’s automation tools help reduce repetitive marketing tasks. You can automatically send welcome emails, follow-up sequences, abandoned cart reminders, and other personalized messages.
Automation ensures subscribers receive the right message at the right time without requiring constant manual work. This creates a more consistent experience while helping you stay connected with your audience.
By automating routine tasks, you can spend more time creating valuable content and growing your business. It also helps improve efficiency while supporting long-term email marketing success.
3. Increase Website Conversions
Growing your email list turns more website visitors into potential customers or loyal readers. Instead of losing contact after a single visit, you can continue building relationships through email.
Mailchimp makes it easy to add signup forms in strategic locations throughout your WordPress website. Visitors can subscribe while reading blog posts, browsing products, or exploring your content.
Staying connected with subscribers creates more opportunities to share new content, promote products, and encourage repeat visits. Over time, this can help improve conversions and support long-term business growth.
4. Deliver Personalized Email Campaigns
Mailchimp helps you create more personalized email campaigns based on subscriber information. You can tailor messages using names, interests, purchase history, and other available data.
Sending relevant content makes your emails more meaningful to each subscriber. This can encourage higher open rates, more clicks, and stronger customer engagement.
Personalized campaigns also help build trust and strengthen long-term relationships with your audience. As a result, your email marketing can become more effective over time.
5. Segment Your Audience
Mailchimp allows you to organize subscribers into targeted groups based on demographics, interests, engagement, or purchase history. This helps you send more relevant emails to different audiences.
Targeted campaigns often perform better than sending the same message to every subscriber. Readers are more likely to engage with content that matches their interests and needs.
Audience segmentation also helps build stronger customer relationships over time. Delivering relevant content can improve engagement, increase conversions, and support more effective email marketing.
6. Save Time With Seamless Integration
Connecting Mailchimp with WordPress automatically syncs your subscriber information between both platforms. This reduces the need for manual updates and helps keep your email list organized.
Automatic synchronization also reduces the risk of duplicate entries and outdated subscriber information. Everything stays up to date as new people join your mailing list.
With less time spent managing contacts, you can focus on creating content, building customer relationships, and growing your business. The integration helps make your email marketing more efficient.
7. Create Professional Emails Without Design Skills
Mailchimp includes professionally designed templates and a drag-and-drop editor that makes email creation more accessible. You can customize layouts, images, colours, and content without coding experience.
The ready-made templates help you create newsletters, promotional emails, and announcements with a polished appearance. They also save time while helping maintain a consistent brand identity.
Professional-looking emails can build trust with your audience and encourage greater engagement. This allows you to focus more on your message than on the design process.
8. Access Valuable Marketing Insights
Mailchimp provides detailed reports that show how subscribers interact with your email campaigns. You can monitor open rates, click rates, audience growth, and other key performance metrics.
Reviewing this information helps you understand which campaigns perform well and where improvements can be made. Small adjustments can often lead to better engagement and stronger results.
Using campaign analytics to guide your decisions helps improve your overall email marketing strategy. It also allows you to create more effective campaigns as your audience and business continue to grow.
Mailchimp Tutorial: A Step-By-Step Guide
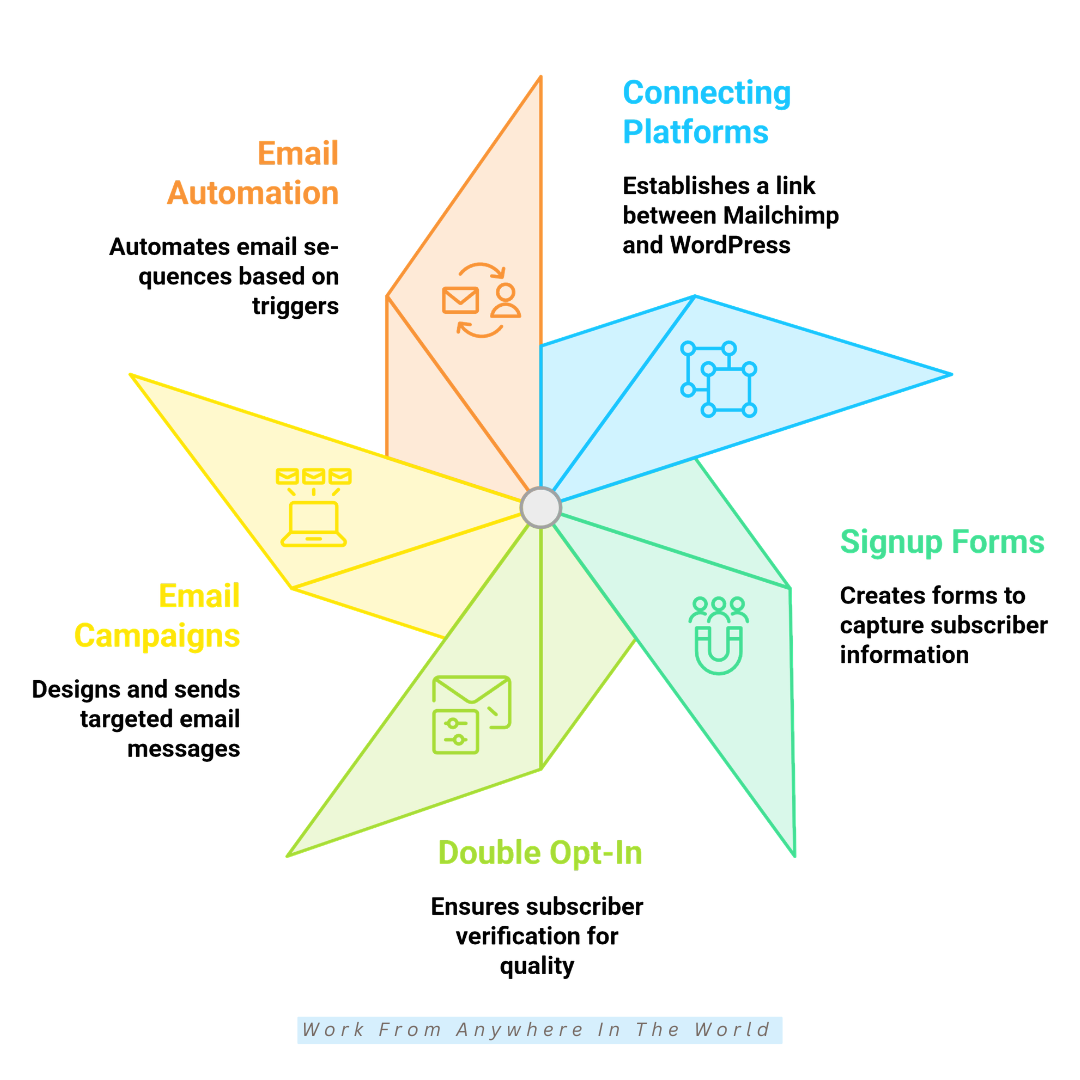
Connecting Mailchimp with WordPress is easier when you follow a clear process. Completing each step in order helps you set up the integration correctly and avoid common problems.
From creating your Mailchimp account to building signup forms and automating email campaigns, each step builds on the previous one. This creates a reliable foundation for your email marketing.
Whether you want to grow your subscriber list or improve communication with your audience, understanding the setup process helps you get the most from both platforms.
The following step-by-step guide explains how to connect Mailchimp with WordPress and use its key features effectively. By the end, you’ll have a fully integrated system ready to support your email marketing goals.
Step 1: Create A Mailchimp Account
Visit the Mailchimp website and create a new account using a valid email address. Choose a secure password and complete the registration process.
Mailchimp will send a verification email to activate your account. After confirming your email address, follow the setup instructions and enter your basic business information.
Once your account is ready, you can access the Mailchimp dashboard and begin creating audiences, email campaigns, and other marketing assets. If you’re still exploring the platform, our Mailchimp Review explains its features, pricing, and who it’s best suited for.
Key Points
- Use a business email address.
- Verify your account after registration.
- Complete your business profile.
- Explore the dashboard before continuing.
Step 2: Set Up Your Audience
After creating your Mailchimp account, the next step is setting up your audience. Your audience stores subscriber information and serves as the foundation for your email marketing campaigns.
Log in to your Mailchimp dashboard and open the Audience section. If this is your first time using Mailchimp, the platform will guide you through creating your first audience.
Next, enter your sender information, including your business name, email address, and physical mailing address. These details help build trust with subscribers and ensure your emails comply with email marketing regulations.
Once your audience is configured, review your notification preferences and other settings. Taking a few minutes to complete this setup now will make managing subscribers much easier later.
Key Points
- Create your first audience.
- Use a professional sender name.
- Add a valid business address.
- Review your notification settings.
Step 3: Install A Mailchimp Integration Plugin
The next step is installing a Mailchimp integration plugin on your WordPress website. The plugin connects WordPress with Mailchimp, making it easier to collect subscribers and manage your email marketing.
Log in to your WordPress dashboard and navigate to Plugins → Add New. Search for a Mailchimp integration plugin and review its ratings, active installations, and recent updates before installing it.
One of the most popular options is Mailchimp for WordPress (MC4WP). Once you’ve selected a plugin, click Install Now, then Activate to add it to your website.
After activation, a new Mailchimp menu or settings page will appear in your WordPress dashboard. From there, you can begin connecting your website to your Mailchimp account.
Key Points
- Choose a well-maintained plugin.
- Check ratings and recent updates.
- Install and activate the plugin.
- Open the plugin settings.
Step 4: Generate Your Mailchimp API Key
A Mailchimp API key allows your WordPress plugin to communicate securely with your Mailchimp account. This connection enables subscriber information and other data to sync automatically between both platforms.
Log in to your Mailchimp account and open your Account settings. From there, navigate to Extras and select API Keys. The exact location may vary slightly as Mailchimp updates its interface.
If you don’t already have an API key, select the option to create one. Mailchimp will generate a unique key that you’ll use when connecting your WordPress plugin.
Copy the API key and store it in a secure location. Since it provides access to your Mailchimp account, treat it as confidential information and replace it immediately if you believe it has been compromised.
Key Points
- Open the API Keys section.
- Generate a new API key.
- Store the key securely.
- Keep your API key confidential.
Step 5: Connect Mailchimp To WordPress
Now it’s time to connect your Mailchimp account to WordPress. This allows your website to sync subscriber information automatically and keeps both platforms working together.
Open the Mailchimp plugin settings in your WordPress dashboard. Most plugins will ask you to enter the Mailchimp API key you created earlier.
Paste the API key into the required field and select Save Changes or Connect. If the connection is successful, you’ll see a confirmation message and a list of your available Mailchimp audiences.
Choose the audience you want to use for new subscribers, then save your settings. Your WordPress website is now ready to collect subscribers and send them to Mailchimp automatically.
Key Points
- Open the Mailchimp plugin settings.
- Paste your Mailchimp API key.
- Connect your Mailchimp account.
- Select the correct audience.
- Save your settings.

Step 6: Create And Place Your Signup Forms
Creating signup forms allows visitors to subscribe to your email list directly from your WordPress website. Well-designed forms help turn website traffic into engaged subscribers.
Open your Mailchimp plugin settings and navigate to the Forms section. Create a new signup form and customize it to match your website’s branding.
Keep your form simple by requesting only the information you need, such as a name and email address. A clear call-to-action button can also encourage more visitors to subscribe.
Once your form is ready, place it where visitors are most likely to see it. Popular locations include blog posts, sidebars, homepages, landing pages, and the website footer.
Key Points
- Keep signup forms simple.
- Request only essential information.
- Use a clear call-to-action.
- Place forms in visible locations.
Step 7: Enable Double Opt-In
Double opt-in adds an extra layer of verification when someone subscribes to your email list. New subscribers receive a confirmation email and must verify their email address before joining your Mailchimp audience.
You can enable double opt-in from your Mailchimp audience settings. Mailchimp also allows you to customize the confirmation email so it matches your branding and clearly explains the verification process.
Although double opt-in adds one extra step, it helps build a higher-quality email list. It reduces fake or invalid email addresses while improving subscriber engagement and email deliverability.
Double opt-in also helps ensure that subscribers genuinely want to receive your emails. This can lead to better open rates and more meaningful interactions with your audience.
Key Points
- Enable double opt-in.
- Customize the confirmation email.
- Build a higher-quality email list.
- Improve email deliverability.
Step 8: Create Your First Email Campaign
Once your audience is ready, you can create your first email campaign in Mailchimp. Campaigns allow you to share updates, promote products or services, and build stronger relationships with your subscribers.
Open the Campaigns section in your Mailchimp dashboard and create a new email campaign. Select your audience, choose a template, and customize the design to match your brand.
Write a clear subject line and create content that provides value to your subscribers. Keep the layout clean, include a strong call to action, and make sure your email is easy to read on both desktop and mobile devices.
Before sending your campaign, preview the email and send a test message to yourself. Reviewing everything carefully helps you catch any mistakes before your subscribers receive the final version.
Key Points
- Choose the correct audience.
- Select a suitable email template.
- Write a clear subject line.
- Preview and test your campaign before sending.
Step 9: Set Up Email Automation
Mailchimp automation allows emails to be sent automatically when subscribers take specific actions or meet certain conditions. Email marketing automation helps businesses send welcome emails, purchase follow-ups, and reminder messages without manual effort.
Automation helps keep communication timely and consistent without requiring every email to be sent manually. It also allows subscribers to receive more relevant messages based on their actions.
Open the Automations or Customer Journeys section in Mailchimp and choose the type of workflow you want to create. Select the trigger, customize the email content, and set any delays between messages.
Review the workflow carefully before activating it. Testing the sequence helps ensure each message is sent at the right time and works as expected.
Key Points
- Choose the right automation workflow.
- Set a clear trigger for each sequence.
- Customize the email content and timing.
- Test the workflow before activating it.
Tips For Using Mailchimp With WordPress
Once you’ve connected Mailchimp with WordPress, a few good habits can help you get even better results. Regular maintenance also keeps your email marketing running smoothly.
Small improvements often have a positive impact on subscriber engagement and campaign performance. Taking a little extra time to review your setup can save time later.
Keeping your plugin updated, testing your forms, and monitoring your campaigns all contribute to a better experience for your subscribers. These simple habits also help prevent common issues.
The following tips will help you make the most of your Mailchimp and WordPress integration. They can also support long-term growth as your email list and website continue to expand.
Tip 1: Test Your Signup Forms Regularly
Testing your signup forms helps ensure new subscribers can join your email list without any problems. Even small changes to your website can sometimes affect how forms work.
Complete a test signup after updating your WordPress website, changing plugins, or modifying your forms. This helps you identify and fix issues before they affect your visitors.
Regular testing also confirms that subscriber information is sent correctly to your Mailchimp audience. A few minutes of testing can help prevent missed opportunities to grow your email list.
Key Points
- Test forms after making changes.
- Confirm subscribers are added correctly.
- Check forms on different devices.
- Fix any issues promptly.
Tip 2: Keep Your Plugin Updated
Keeping your Mailchimp integration plugin up to date helps maintain security, compatibility, and performance. Plugin updates often include bug fixes and support for the latest WordPress features.
Before installing updates, consider creating a website backup. This provides an extra layer of protection should anything unexpected occur during the update process.
Review your website after each update to confirm everything is working as expected. Regular maintenance helps keep your Mailchimp integration running smoothly.
Key Points
- Install plugin updates regularly.
- Create a backup before updating.
- Check compatibility with WordPress.
- Test your website after updates.
Tip 3: Maintain A Healthy Subscriber List
A healthy subscriber list helps improve email deliverability and campaign performance. Keeping your audience up to date ensures your messages reach people who genuinely want to hear from you.
Review your subscriber list regularly and remove inactive or invalid email addresses when appropriate. You can also update contact information and organize subscribers into relevant groups.
Maintaining a clean and organized email list helps improve engagement and provides more accurate campaign reports. It also supports long-term email marketing success.
Key Points
- Review your subscriber list regularly.
- Remove inactive email addresses.
- Update subscriber information.
- Organize contacts into relevant groups.
Tip 4: Send Valuable Content Consistently
Sending valuable content encourages subscribers to stay engaged with your emails. Focus on sharing information, tips, updates, or offers that match your audience’s interests.
Maintain a consistent email schedule so subscribers know when to expect your messages. Regular communication also helps build familiarity and trust over time.
Providing useful and relevant content helps strengthen relationships with your audience. It can also improve open rates, click rates, and long-term subscriber loyalty.
Key Points
- Share useful and relevant content.
- Maintain a consistent email schedule.
- Focus on your audience’s interests.
- Build long-term subscriber relationships.
Tip 5: Review Your Automation Workflows
Automation workflows help keep your email marketing running smoothly. Reviewing them regularly ensures emails are sent at the right time and continue supporting your marketing goals.
Check your automated sequences to confirm that links, timing, and email content are still accurate. Update workflows whenever you introduce new products, services, or promotions. For more ideas on managing your campaigns and automation, see How To Work With Mailchimp.
Regular reviews help improve the subscriber experience and keep your automation relevant. Small adjustments can make your email campaigns more effective over time.
Key Points
- Review automation workflows regularly.
- Update outdated email content.
- Test links and email timing.
- Adjust workflows as your business grows.
Tip 6: Monitor Your Campaign Results
Monitoring your campaign results helps you understand how subscribers respond to your emails. Mailchimp’s reports provide valuable insights into open rates, click rates, and overall engagement.
Review your campaign performance regularly to identify what works well and where improvements can be made. Even small changes to subject lines or content can improve future results.
Using campaign data to guide your decisions helps you create more effective email marketing campaigns. Consistent monitoring supports long-term growth and stronger subscriber relationships.
Key Points
- Review campaign reports regularly.
- Track opens and click rates.
- Identify opportunities for improvement.
- Use analytics to guide future campaigns.
Frequently Asked Questions
Q1: Is Mailchimp Free For WordPress Users?
Yes. Mailchimp offers a free plan that includes audience management and basic email marketing features. It’s a practical option for building an email list and learning the platform before upgrading.
Q2: Can I Use Mailchimp Popups On WordPress?
Yes. Mailchimp supports popup forms that you can add to your WordPress website. When used appropriately, popups can help increase email signups and grow your subscriber list.
Q3: Which Mailchimp Plugin Is Best For WordPress?
Mailchimp for WordPress (MC4WP) is one of the most popular plugins because it’s lightweight, easy to configure, and integrates well with WordPress. Other options, such as WPForms, Fluent Forms, Elementor Pro, and Gravity Forms, also provide Mailchimp integration.
Q4: Can I Use Mailchimp Without Coding Skills?
Yes. Mailchimp is designed for users without programming experience. Most WordPress integrations include setup wizards, drag-and-drop form builders, and ready-made templates that make creating email campaigns straightforward.
Q5: Why Should I Connect Mailchimp With WordPress?
Connecting Mailchimp with WordPress allows you to collect subscribers, automate email marketing, and manage your audience more efficiently. It also keeps your website and email platform synchronized.
Q6: How Do I Know If My Mailchimp Integration Is Working?
After connecting Mailchimp with WordPress, submit a test signup form and confirm that the subscriber appears in your Mailchimp audience. You should also test automated emails and forms regularly to ensure everything continues working correctly.
Conclusion
Learning how to use Mailchimp with WordPress makes it easier to grow your email list and manage subscriber communication from one connected platform. The integration helps simplify many everyday email marketing tasks.
From creating signup forms to automating campaigns, Mailchimp provides the tools needed to build stronger relationships with your audience. Following each step carefully helps create a reliable foundation for future marketing efforts.
As your website grows, you can continue refining your email strategy through audience segmentation, automation, and performance tracking. Small improvements can lead to better engagement and more effective campaigns.
With the right setup and consistent communication, Mailchimp and WordPress can become a valuable combination for growing your audience and supporting your long-term marketing goals.
I trust you enjoyed this article on How To Use Mailchimp With WordPress. Please stay tuned for more insightful blogs on affiliate marketing, online business, and working from anywhere in the world.
Take care!
— JeannetteZ 🌍✨
💬 Your Opinion Is Important To Me
Do you have thoughts, ideas, or questions? I’d love to hear from you. Please leave your comments below or email me directly at Jeannette@WorkFromAnywhereInTheWorld.com.
📚 More Work From Anywhere Reads
🚀 Ready to Build a Business You Can Run from Home
Or from Anywhere in the World?
Imagine creating income on your terms — from home, a cozy café, or wherever life takes you.
With the right tools, training, and community support, it’s entirely possible.
Start your own online business for free — no credit card needed.
Disclosure
This post may contain affiliate links. As an Amazon Associate and participant in other affiliate programs, I earn from qualifying purchases at no extra cost to you. Please read my full affiliate disclosure.