AWeber Tutorial: Unlock Powerful Email Marketing Success
Looking to level up your email marketing game? This AWeber Tutorial is your perfect starting point. Whether you're a beginner or need a refresher, we’ll guide you through every step to create engaging campaigns, grow your list, and drive results.
Learn how simple it is to connect with your audience and grow your business using AWeber's powerful tools—no prior tech knowledge is required!
What Is AWeber?
An email marketing platform called AWeber was created to assist companies and entrepreneurs in reaching their target customers.
It offers tools to create and send professional emails, automate campaigns, build subscriber lists, and track performance.
With features like drag-and-drop email builders, customizable templates, and integration with eCommerce and website platforms, AWeber simplifies email marketing for users of all skill levels.
It's widely used for newsletters, promotions, and automated follow-ups, making it ideal for small businesses and content creators aiming to grow their brand and engage customers effectively.
Top Features Of AWeber
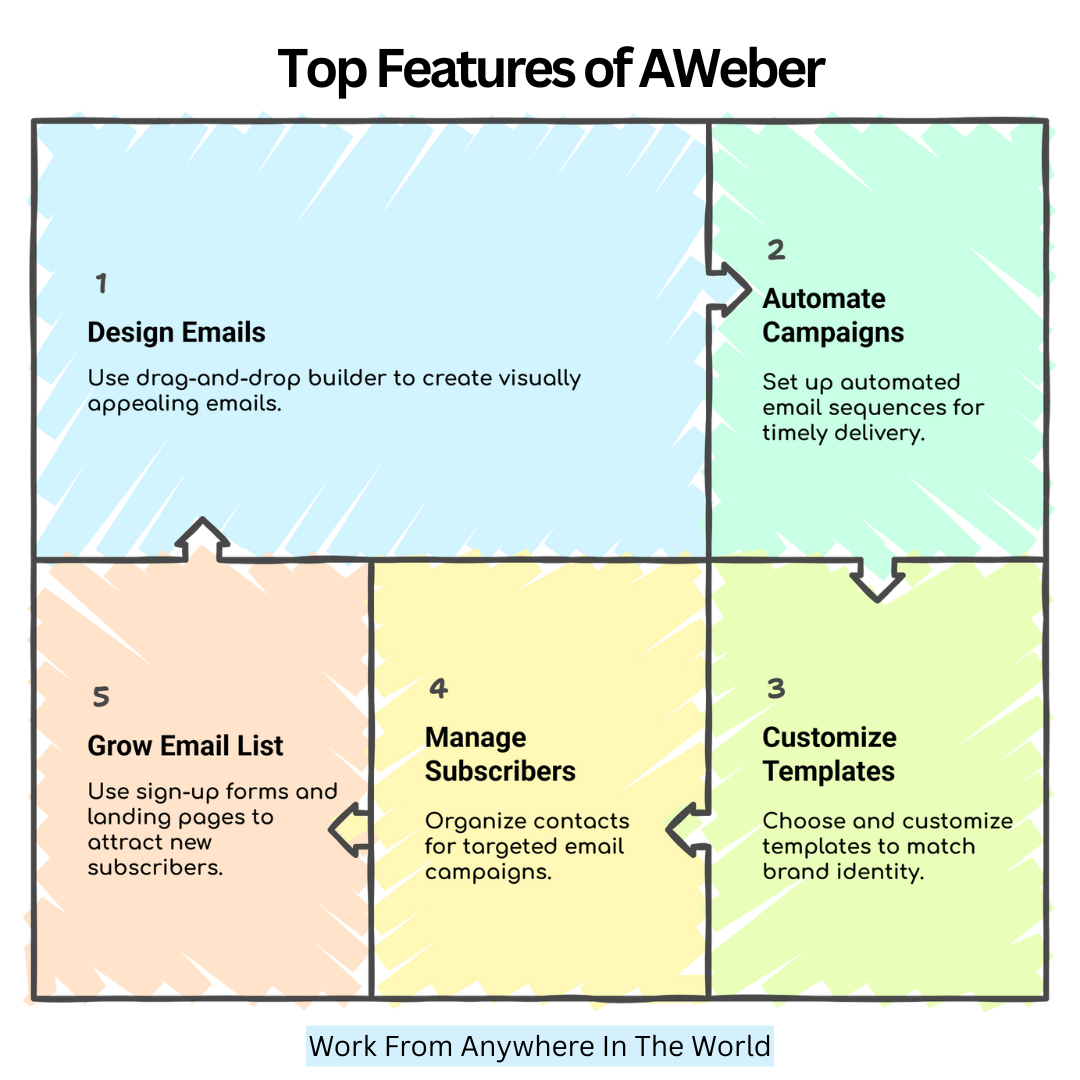
By simplifying campaign creation, automating messaging, and boosting engagement with practical, user-friendly tools, AWeber is a powerful email marketing platform that aids businesses in connecting with their audience and growing.
1. Easy Drag-and-Drop Email Builder
AWeber’s drag-and-drop email builder allows users to design emails visually by simply dragging elements like text, images, buttons, and videos into place. No coding or design experience is needed.
This intuitive interface helps marketers quickly create professional-looking emails that are mobile-responsive. Simplifying email creation saves time and effort, enabling businesses to send engaging campaigns faster.
This feature helps improve email aesthetics and boosts subscriber engagement by making emails more appealing and easy to read on any device.
Key Points
- Simplifies email creation with a visual, no-code interface
- Speeds up campaign launches
- Creates mobile-responsive, visually appealing emails
2. Automation And Autoresponders
This AWeber tutorial highlights how automation and autoresponders can streamline email marketing by nurturing leads and boosting engagement effortlessly.
Autoresponders automatically send welcome emails, follow-ups, or drip campaigns based on user behaviour, like signing up or clicking a link. This hands-free email marketing nurtures leads over time without manual intervention.
It helps businesses build relationships and keep audiences engaged consistently, improving conversion rates and saving time on repetitive tasks by delivering the right message to the right subscriber at the right moment.
Key Points
- Automates email sequences based on subscriber actions or dates
- Sends timely welcome emails and follow-ups automatically
- Nurtures leads without manual effort
3. Email Templates
Hundreds of expertly created email templates that are completely editable and mobile-friendly are available from AWeber.
Users can select templates based on industry, purpose, or style and then tweak colours, fonts, and images to align with their brand.
These templates help marketers maintain a consistent and attractive brand presence in their emails without starting from scratch.
Using templates reduces design time and ensures emails look polished across all devices, boosting credibility and encouraging higher open and click-through rates.
Key Points
- Offers hundreds of customizable, mobile-optimized templates
- Aligns emails with your brand identity
- Saves design time and improves open and click rates
4. Subscriber Management
With AWeber’s subscriber management tools, users can easily organize their contacts by adding tags, segments, or custom fields based on demographics, behaviour or preferences.
This segmentation allows for sending highly targeted emails tailored to specific groups. The system automatically updates lists when subscribers engage or unsubscribe, ensuring data stays clean.
Better segmentation helps marketers send relevant content, increasing engagement and reducing unsubscribes. It also enables more personalized campaigns that resonate with different audience segments, driving stronger relationships and better results.
Key Points
- Organizes contacts with tags, segments, and custom fields
- Enables targeted, relevant campaigns
- Keeps lists clean and reduces unsubscribes
5. Sign-up Forms And Landing Pages
Customized landing pages and sign-up forms are offered by AWeber and can be shared online through links or embedded on webpages.
These forms capture subscriber information with ease and can be designed to match brand aesthetics. Landing pages act as dedicated pages for promotions or offers, driving conversions.
The platform integrates forms directly with the email list, so new subscribers are instantly added and can receive automated follow-ups. These tools help grow an email list effectively by converting website visitors into engaged subscribers.
Key Points
- Creates customizable forms and landing pages
- Integrates directly with email lists for instant follow-ups
- Converts visitors into engaged subscribers
6. Analytics And Reporting
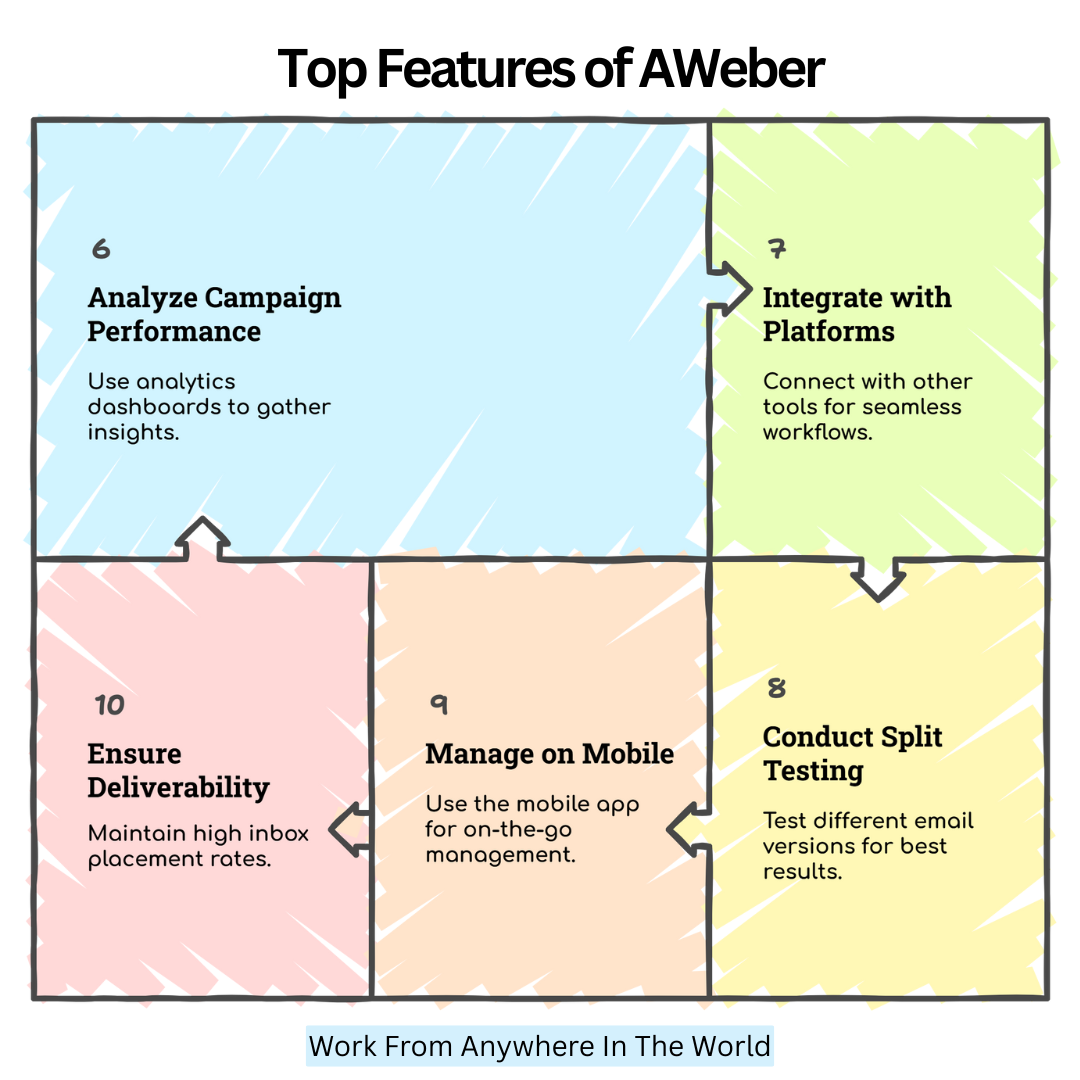
AWeber provides detailed analytics dashboards that show how campaigns perform, including open rates, click rates, bounce rates, and unsubscribe statistics.
This AWeber video shows you how to track success and efficiently optimize your email marketing plan using analytics and reporting tools.
This data helps marketers understand what content resonates best and identify areas for improvement. Real-time reporting enables quick adjustments to campaigns for better results.
Businesses may improve ROI, enhance email tactics, and make data-driven decisions that expand their audience and revenue by utilizing these insights.
Key Points
- Provides detailed metrics on opens, clicks, bounces, and unsubscribes
- Offers real-time campaign performance tracking
- Enables data-driven optimization and better ROI
7. Integrations
Numerous well-known systems, like WordPress, Shopify, PayPal, Zapier, and numerous CRM solutions, are easily integrated with AWeber.
These connections automate workflows by syncing contacts, triggering emails from purchases or sign-ups, and collecting data without manual entry. Integrations streamline marketing efforts, save time, and reduce errors.
By connecting AWeber to other business tools, users create a cohesive system that improves efficiency, enhances customer experience, and supports multichannel marketing strategies.
Key Points
- Connects with WordPress, Shopify, PayPal, Zapier, CRM, and more
- Automates workflows and syncs data across platforms
- Supports multichannel marketing strategies
Wealthy Affiliate – Mini Review (2025)
If you’ve ever thought about turning your blog, passion, or niche into an online business,
Wealthy Affiliate (WA) is one of the most beginner-friendly platforms I’ve used.
It combines step-by-step training, website hosting, SEO research tools,
and an active community all in one place.
What I like most: you can start free (no credit card needed),
explore lessons, test the tools, and connect with other entrepreneurs
before upgrading. WA isn’t a “get rich quick” scheme — it’s a platform where success comes
from consistent effort and applying what you learn.
8. Split Testing
AWeber’s split testing (A/B testing) allows users to send different versions of emails to small portions of their list to determine which performs best based on opens, clicks, or conversions.
After identifying the winning variant, the platform automatically sends it to the remaining subscribers. This testing helps optimize subject lines, content, or design elements to maximize engagement.
By continuously refining emails through data-backed decisions, marketers increase campaign effectiveness and improve subscriber response rates over time.
Key Points
- Test different email variants (subject, content, design)
- Automatically sends the best-performing email to most subscribers
- Improves engagement and response rates
9. Mobile App
The AWeber mobile app lets users manage email campaigns, monitor analytics, and add subscribers anytime, anywhere from their smartphones or tablets.
It provides notifications about campaign performance and allows quick edits or follow-ups on the go. This flexibility ensures marketers stay connected to their audience and campaigns even when away from their computers.
It is easier to maintain constant communication and keep marketing initiatives on track when essential tools are accessible remotely. This enhances responsiveness and efficiency.
Key Points
- Allows campaign management and analytics monitoring on mobile
- Enables adding subscribers on the go
- Enhances flexibility and responsiveness
10. Deliverability
AWeber prioritizes high email deliverability by following strict anti-spam policies, maintaining a good sender reputation, and using verified IP addresses. This ensures emails reach subscribers’ inboxes rather than spam folders.
This AWeber tutorial shows how to improve email deliverability by maintaining list health and ensuring your messages land in subscribers' inboxes. High deliverability is crucial because it directly impacts open rates and campaign success.
By reliably getting emails in front of the audience, AWeber helps businesses maximize the impact of their marketing messages and grow stronger subscriber relationships.
Key Points
- Maintains high inbox placement with strong anti-spam measures
- Uses verified IPs and list-cleaning tools
- Maximizes email reach and campaign success
AWeber Tutorial
With its sophisticated email campaigns and subscriber management tools, AWeber is a potent email marketing platform that helps companies expand their audience, automate communications, and boost engagement.
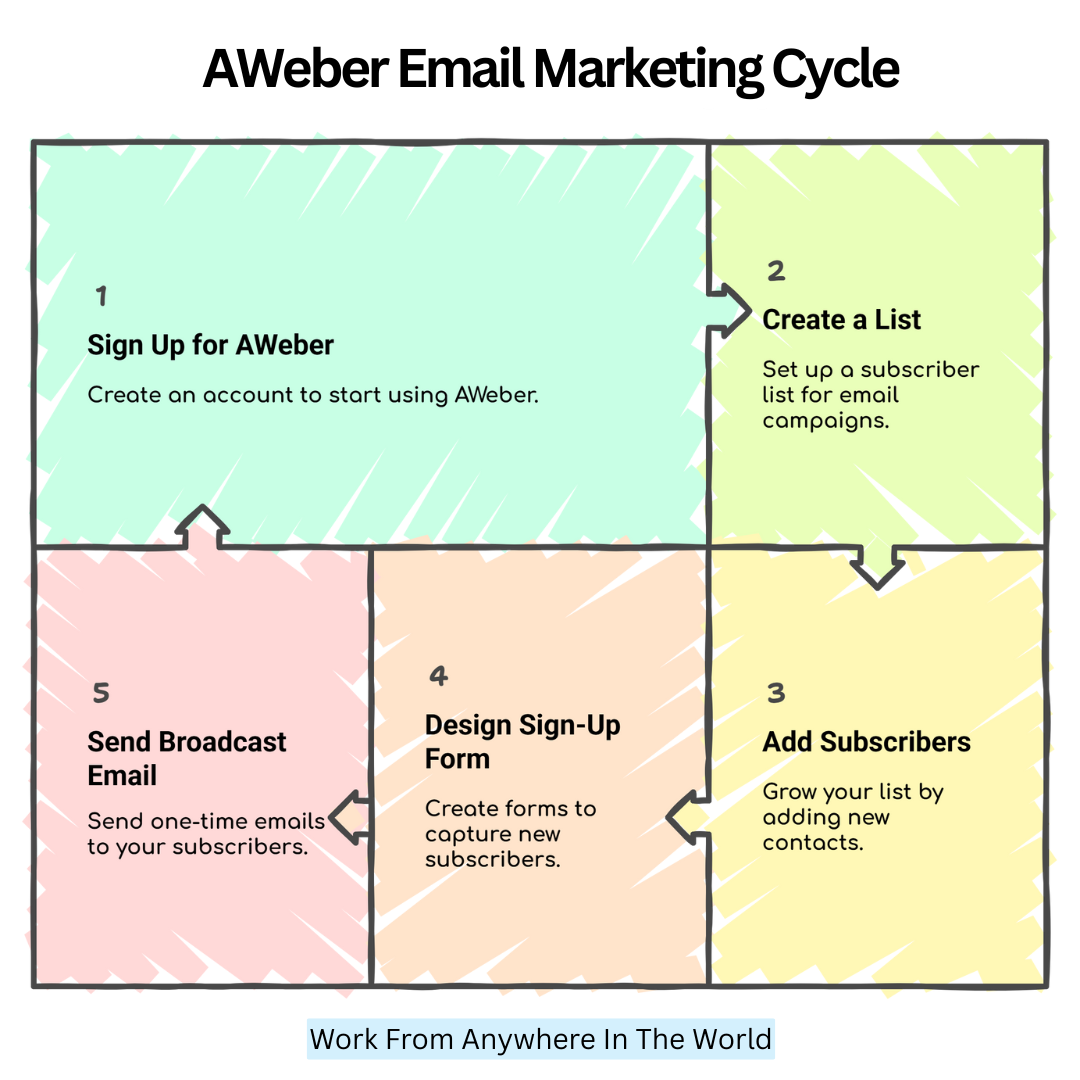
1. Sign Up For AWeber
To get started, go to aweber.com and click “Sign Up.” You can choose between the Free Plan (for up to 500 subscribers) or a paid plan for more advanced features.
Fill in your name, email, and business information to create your account. Log in to access your dashboard after registering. AWeber will guide you through a setup wizard.
You'll also need to verify your email and enter your business address, which is required for email compliance (per CAN-SPAM laws). This process ensures your emails meet legal standards and helps build trust with your audience.
Key Points
- Choose a Free or paid plan based on subscriber needs
- Provide name, email, and business info
- Verify email and enter business address for CAN-SPAM compliance
- Ensures legal standards and builds trust with subscribers
2. Create A List
This AWeber tutorial walks you through creating a list, the essential first step to organizing and communicating with your email subscribers.
Put in the name of your list, the name of your business, the URL of your website, and a synopsis of what subscribers may anticipate. You’ll also add a “From” name and email address—this is who your emails appear to be from.
Lastly, you’ll write a confirmation message if you’re using double opt-in. This list serves as your audience hub, storing all your subscribers and email activity. You can later segment and target subscribers within this list based on their behaviour or preferences.
Key Points
- Start by creating a list from the dashboard
- Enter list name, company info, and description
- Set “From” name and email for sender identity
- Write a confirmation message for double opt-in
- List stores subscribers and email activity for targeting
3. Add Subscribers
You can grow your list by manually adding subscribers, importing from a CSV file, or using sign-up forms. To add subscribers manually, go to “Subscribers” > “Add Subscribers.”
Fill in the email address and other relevant details. For larger groups, use the import tool and map columns accordingly (e.g., first name, email, tags).
You must verify with AWeber that every imported contact has consented to receive your emails. You can also automatically add subscribers through integrations with tools like PayPal, Shopify, or your website forms, making list-building seamless and automated.
Key Points
- Add contacts manually, import via CSV, or use integrations
- Confirm all contacts have opted in to comply with the rules
- Import and map subscriber data accurately
- Automate list growth with integrations like PayPal and Shopify
4. Design A Sign-Up Form
To collect new subscribers, create a sign-up form by clicking “Sign Up Forms” > “Create a Sign-Up Form.” Use AWeber’s drag-and-drop builder to customize the design, add input fields (like name and email), and write compelling calls-to-action.
This AWeber tutorial guides you through designing and publishing a custom sign-up form to capture and grow your email list effectively.
After that, publish the form by sharing a hosted URL or embedding it on your website using the HTML code that was supplied.
AWeber also offers pop-up and slide-in forms. You can even integrate the form with platforms like WordPress using plugins to streamline lead capture.
Key Points
- Use the drag-and-drop builder to create customizable forms
- Add input fields and calls-to-action matching the brand style
- Publish forms via embed code or hosted URL
- Use pop-ups, slide-ins, or WordPress plugins for lead capture
5. Create And Send A Broadcast Email
Broadcast emails are one-time messages sent to your list. To create one, click “Messages” > “Create a Message” > “Drag & Drop Email Builder.”
Choose a template or start from scratch. Add your text, images, buttons, and other elements. You can personalize emails with subscriber names using merge tags.
Once your email is ready, click “Schedule a Broadcast,” choose your list, and select the date and time. You can also enable click tracking and set message tags.
Broadcasts are great for newsletters, promotions, and announcements, ensuring timely communication with your audience.
Key Points
- Use the drag-and-drop builder to design one-time emails
- Text and visuals can be added after starting from scratch or using a template.
- Personalize with merge tags (e.g., subscriber name)
- Schedule emails with click tracking and tagging options
- Ideal for newsletters, promotions, and announcements
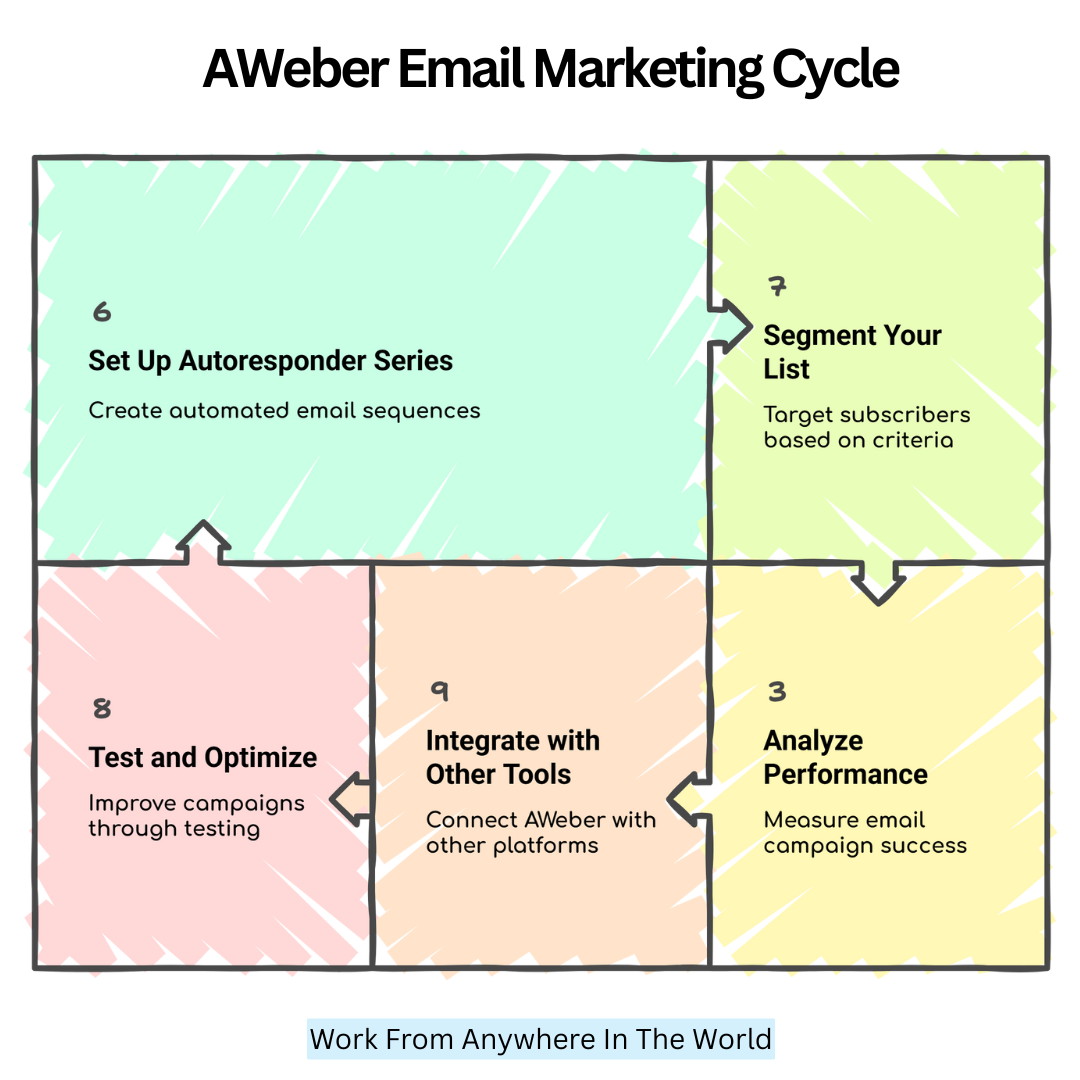
6. Set Up An Autoresponder Series
Autoresponders allow you to send automated email sequences over time. Go to “Automations” > “Campaigns” > “Create a Campaign.” Choose from templates like “Welcome Series” or create a custom flow.
Drag in actions such as “Send a Message,” “Wait,” or “Tag Subscriber.” Verify that every imported contact has consented to receive your emails, according to AWeber's requirements. Each message is created using the same drag-and-drop editor.
Once your sequence is complete, activate it. These campaigns help build relationships and deliver value to subscribers without manual effort.
Key Points
- Create automated email campaigns via a drag-and-drop flow editor
- Use templates like “Welcome Series” or customize your own
- Add actions: send message, wait, tag subscriber
- Automate relationship-building without manual effort
7. Segment Your List
Segmentation lets you target subscribers based on actions, interests, or demographics. In AWeber, click “Subscribers” > “Manage Subscribers.”
You can create segments using filters like open rates, click activity, sign-up date, or assigned tags. For example, you can make a segment of people who clicked on a product link or those who haven’t opened emails in 30 days.
When sending broadcasts, choose to send to specific segments for more relevant messaging. You can also automate tagging based on subscriber behaviour, allowing for smarter, behaviour-based campaigns that increase engagement and conversion.
Key Points
- Create segments using filters: opens, clicks, tags, and signup date
- Target specific groups with tailored emails
- Automate tagging based on subscriber behaviour
- Improves relevance, engagement, and conversions
8. Analyze Performance
After sending emails, AWeber provides detailed analytics to measure success. Go to “Reports” to view open rates, click-through rates, unsubscribes, bounce rates, and more.
You can drill down into each broadcast to see who opened it, which links they clicked, and when. Use this data to understand what’s working and refine your messaging.
For example, if a subject line has a high open rate, reuse its structure. If a specific type of content gets more clicks, produce similar content. AWeber also supports A/B split testing to compare two versions of an email and improve performance.
Key Points
- View detailed reports: open rates, clicks, unsubscribes, bounces
- Drill into individual campaign and subscriber activity
- Use insights to refine subject lines, content, and timing
- Supports A/B split testing for continuous improvement
9. Integrate With Other Tools
This AWeber tutorial explains how to integrate with tools like Shopify and Zapier to automate workflows and simplify your email marketing process.
Go to “Integrations” to connect tools like WordPress, Shopify, PayPal, Zapier, Facebook, and more. AWeber might, for example, automatically add a customer to your email list and send them a thank-you email following their purchase of Shopify.
With Zapier, you can set up workflows such as sending a Slack notification every time a new subscriber joins. These integrations help automate tasks and keep your systems connected, allowing you to focus more on content and engagement, not manual data entry.
Key Points
- Connect AWeber with WordPress, Shopify, PayPal, Zapier, etc.
- Automate subscriber addition and trigger emails from actions
- Create workflows, e.g., Slack alerts for new subscribers
- Streamlines marketing and reduces manual tasks.
10. Test And Optimize
Email marketing success depends on ongoing testing and optimization. AWeber allows A/B split testing, where you can compare different subject lines, sender names, or content versions. To do this, go to “Messages” > “Split Tests.”
Select the variables you want to test and choose the sample size. Based on open or click rates, AWeber will automatically distribute the winning version to the remaining members of your list after sending the other versions.
Also, review campaign performance regularly to tweak timing, messaging, and visuals. Testing ensures you’re constantly improving and adapting to what your audience prefers.
Key Points
- Run A/B split tests on subject lines, sender names, and content
- Define sample size and test variables easily
- Instruct the remaining subscribers to receive the winning version automatically.
- Regularly review and tweak campaigns for the best results.
Conclusion
You’ve now explored the essential steps in this AWeber Tutorial to kickstart your email marketing success. With the right tools and strategy, building meaningful connections and growing your audience becomes easier than ever.
Don’t wait—put these tips into action and start seeing real results today. Keep this page bookmarked for future updates and additional helpful guides, and come back anytime you need a little boost in your marketing endeavours.
I trust you enjoyed this article on the AWeber Tutorial: Unlock Powerful Email Marketing Success. Please stay tuned for more insightful blogs on affiliate marketing, online business, and working from anywhere in the world.
Take care!
— JeannetteZ
💬 Your Opinion Is Important To Me
Do you have thoughts, ideas, or questions? I’d love to hear from you. Please leave your comments below or email me directly at Jeannette@WorkFromAnywhereInTheWorld.com.
📚 More Work From Anywhere Reads
🚀 Ready to Build a Business You Can Run from Home
or from Anywhere in the World?
Imagine creating income on your terms — from home, a cozy café, or wherever life takes you.
With the right tools, training, and community support, it’s entirely possible.
Start your own online business for free — no credit card needed.
Disclosure
This post may contain affiliate links. As an Amazon Associate and participant in other affiliate programs, I earn from qualifying purchases at no extra cost to you. Please read my full affiliate disclosure.

