How To Get Started With Moosend – An Easy Tutorial
How To Get Started With Moosend – An Easy Tutorial
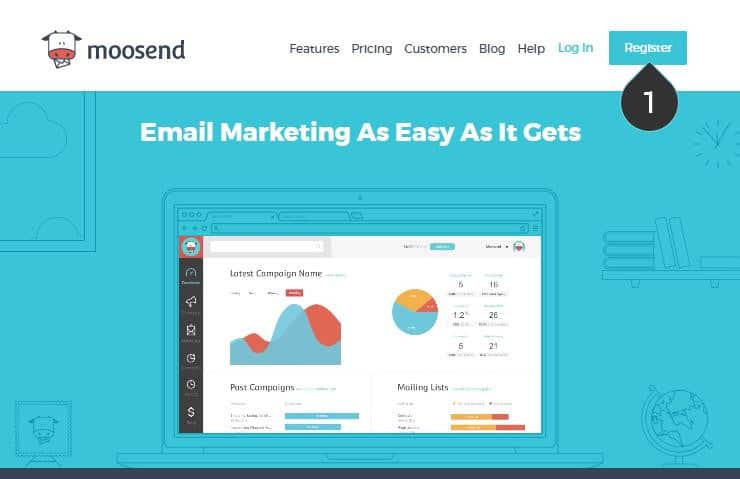
Moosend is an email marketing platform. It will provide you with all the necessary tools you need to start your email marketing campaigns. If you have already built up your list and want to move to Moosend from another platform, you will be given all the state-of-the-art features that will improve your toolbox and make your life easier.

A) How To Create A Moosend Account
Track the following procedure:
- Go to the Moosend web page and click the Sign-up button.
- Enter your email address and password.
- Click the red button that says “Create Your Free Account.”
- Fill in your full name and company name and choose a name for your domain. Your domain is where you can access your account in Moosend. Example.moosend.com is going to be your domain name. Try to write something related to your industry or business instead of the “Example.”
- Once you are done with the name task, hit the “Complete Your Registration” button.
- Now, you will see two questions. Answering them in depth will help Moosend customize your account so that you get whatever you need.
- After you answered the questions, you should choose to submit your extra info. Your account is now created successfully. You will get an email with an activation link.
- Check your email and click on the link to activate your account.
Now you are done with creating a Moosend account. The next step is to log in to your Moosend domain. Then you can start using this amazing email marketing platform.
B) Create Your First Sender Signature
A Sender Signature is what your recipients will see in their inbox’s “From” field. It is actually your email’s name and address. The email address you used when registering will be set as the name of your email. But you can add as many senders as you want.
Having multiple senders will help you to have different senders for different parts of your list and segments. It is better to use a certain sender for a certain list as your recipients will get used to a particular sender, and they anticipate seeing that name in their inbox when you send out a campaign.
On the other hand, changing senders will encourage inactive recipients to open your newsletter and renew their interests.
To set up a new sender, follow this procedure:
- On the uppermost right corner of your Moosend account, you will see a gear-shaped icon. Click on it.
- A vertical menu will be opened. Select the “Senders” option.
- Hit the blue button that says “Add new senders” to add a sender in addition to the email address you registered with.
- Enter the name and email address of the new sender. Remember that this name will appear to your recipients, so choose a name related to your company. If you think your customers will respond better to a human name, you can write it instead.
- Save sender. You can always return and hit the “Cancel & return to senders” if you change your mind.
- You will receive a confirmation email, click on the link, and you will be redirected to your control panel.
- Open your sender list; your new sender should have a tick next to it in the verified column.

C) Create Your First Mailing List
You need to create an empty mailing list, and later on, you will fill it up with your subscribers.
How To Create A Mailing List?
Creating a mailing list is the most important task in email marketing.
Track the following steps to create a mailing list:
- In the left-side menu bar of your Moosend account, you will see an opened envelope. This is the Mailing Lists icon. Open it.
- In the opened window, there is a blue button on the top right. Hit the “Create a new list.”
- Please assign a name to your mailing list and save it.
It is better to start making some custom fields to input data that you collect on your subscribers.

How To Create Customs Fields?
If you want to enrich your current mailing list with extra information from your subscribers, then you need more fields than just an email address and a name to sign up to your mailing list.

To create a custom field, follow the instructions below:
- Go to the mailing list.
- Select the mailing list you wish to add the new custom field.
- A new vertical menu will appear. Open the “Custom fields” tab.
- In the newly opened window, click on the blue button at the top right that says “Add new custom field.” There is a table with the fields already available for this list (Email, Name, and Mobile).
- Write in the field name from your new custom field.
- Choose the data type of your new custom field. You can see Text, Date-Time, Number, and more. You can select what you want.
- Set a default fallback value.
- Tick the Required box to determine if you want this field to be obligatory while someone is filling your subscription form.
- Tick the Hidden box to determine if you want this field to appear or stay hidden while someone updates their profile via the Update Profile link.
- Hit the “save custom field” button to create the custom field.
- By clicking on the three dots menu on the bottom right corner, you will delete or copy any custom fields you created to another list if you want.
Consider that you can use this data to personalize tags inside your email campaign, which you can use to segment your mailing list. In this way, you can combine your subscriber’s response (such as open, link click, and so on) with the data like their age, location, or other information you collect from the custom fields you use.
D) Filling Your Mailing List
Once you create your mailing list as you want, you can continue filling it up with members. There are two options for you: either import subscribers from an external source file or copy and paste their data.
The left menu bar contains the following options:
- Dashboard: You can see different statistics of your mailing list, custom fields, tags, and your member’s location
- Members: View all the members of your list with their status
- Batch Actions: A series of mass actions that you can perform, import, archive, delete, unsubscribe, or copy members from a different list
- Custom Field: Create or edit custom field
- Segments: Create segments or edit
E) Create Your First Email Marketing Campaign
Now you are ready to create your first email marketing campaign. Please select a type for your campaign and then write a catchy name for it. Select the sender who will send the campaign and the mailing list that is going to receive it. Next, you have to define the campaign content and send it to the world. You can send it immediately or set a schedule for a later time. First, try to send a test campaign to you and your colleagues to preview and check it before sending it out to actual customers. Once your campaign is sent out, you can go to the report menu and check its statistics.

How To Create A New Email Marketing Campaign?
Creating an email marketing campaign with Moosend is very easy. This procedure is made of seven straightforward steps:
Step 1: Campaign Type And Sender
Please set the type, name, subject, sender, reply-to, and send confirmation-to fields for your campaign.
Step 2: Select Mailing List
Choose the mailing list for your first Moosend campaign ever.
Step 3: Select Format
Here you can choose whether you want to send out a plain text or a modern HTML campaign. A modern one includes images, links, text, and other components. We recommend you choose an HTML campaign every time.
Step 4: Define Content
You can upload an HTML design as content or design a newsletter utilizing the Moosend campaign editor.
Step 5: Spam And Delivery Test
First, you can send a sample of your campaign to a few email addresses and check its look.
Step 6: Schedule Delivery
You can send your campaign immediately or set a date and time to send it later.
Step 7: Snapshot
Check everything in an overview before clicking the “Send” button.
Now, to start, click on the “New Campaign” button next to your account logo:
A. Choosing Campaign Type
On the Regular Campaign, click the “Create” button.
You have five options to select your campaign type: the Regular Campaign, the A/B Split Test Campaign, the Repeatable HTML Campaign, the RSS Campaign, and the Automation campaign.
B. Defining The Campaign Settings
1. To set up the available fields. You need to provide the following information:
Campaign Name
The name of your campaign is only for your usage and to find it easier in the future.
Subject
The subject of your campaign will be appearing in your customers’ mailboxes.
Sender
The campaign sender, as you know, is the email address and name from which the campaign is sent out.
Reply-to
The reply-to address is for someone who may want to reply to your campaign.
Send confirmation to
The email address that Moosend will send a confirmation email when the campaign is sent out.
2. Tick the two available boxes based on your preferences.
3. Click Next
C. Selecting A Mailing List
1. Chose a list which is going to receive your campaign.
If you have created more than one, you can select more than one here to send your campaign. Also, you can choose a previously built segment of a list rather than choosing an entire list.
Just the active members of the list will receive your campaign.
2. Select a Segment you want.
This is a good time to make a new segment if you do not have any segments.
3. Click Next
D. Selecting The Campaign Format
1. Select an appropriate format for your campaign.
There are plain text and HTML options to choose from. If you do not have a specific reason to use the plain text campaign, we encourage you to choose the HTML one.
2. Click Next
E. Creating The Template
- If you do not create content for your campaign, hit the “Take me to the Editor” button.
- Select the appropriate options from the Import Campaign tab if you already have a design at the ready.
- Click Next
F. Testing Spam And Delivery
- In case you want to check the look and delivery of your campaign, go to the Design and Delivery Test tab and send it to a small group of test emails.
- Go to the Content spam test tab to be sure your campaign passes all the popular spam filters set by email clients.
- If you want to proceed without a test, click on the Skip Test button.
G. Scheduling Campaign Delivery
1. If you want to send out your campaign immediately, select the Send this campaign immediately option.
2. If you wish to have your campaign be sent out on a date and time that you schedule, select the Schedule this campaign to be sent out at a future date and time option.
3. Set up the appropriate fields with the necessary information
You should specify the following:
- The date and time of delivery
- Your time zone
4. If you wish to set up a time and send your campaign again to the subscribers who did not open it, enable Automated Resending.
5. Fill up the appropriate fields with the necessary information.
You should specify the following:
- The time that should pass after the original campaign is delivered.
- The subject of your recent campaign (Although, you can leave this empty if you do not want to change the subject)
- The sender of your recent campaign
6. Click Next
H. Looking At The Snapshot
- Have a look at all of your campaign details again.
- Hit the Preview button to see your newsletter design.
- Click Send if you are ready!
Congratulations, you have just completed your first campaign send-off!
Conclusion
Moosend is an email marketing platform that will provide you with all the necessary tools you need to start your email marketing campaigns. In this step-by-step tutorial, we explain every step in detail for you.
I trust you enjoyed this article about How To Get Started With Moosend – An Easy Tutorial. Please stay tuned for more articles to come. Take care!
JeannetteZ
Your Opinion Is Important To Me
Thoughts? Ideas? Questions? I would love to hear from you. Please leave me your questions, experiences, remarks, and/or suggestions about this article on How To Get Started With Moosend – An Easy Tutorial in the comments section below. You can also reach me by email at Jeannette@WorkFromAnywhereInTheWorld.com.
>>>Click here to go to Moosend<<<
You might also enjoy these blog posts:
MailChimp – Best Tutorial For Beginners


This is an excellent article
the clearest I have seen on Moosend so far.
well done!
Thank you very much for your compliment, Rachel. I am investing a lot of time and effort into my websites and it is truly encouraging to get positive feedback. Thanks again, Rachel.
Jeannette