Magento Review: Honest Pros And Cons
Magento Review: Honest Pros And Cons For E-Commerce Success
Looking for the ultimate eCommerce solution? In this Magento review, we dive deep into the platform’s powerful features, flexibility, and performance to see why it’s trusted by thousands of online businesses worldwide.
For businesses to have a fully operating, optimized Magento store, they must be willing to spend money on setup, training, and development.

What Is Magento?
Magento is a robust open-source eCommerce platform which businesses can use to create and run online stores with flexibility and scalability.
It was established on March 31, 2008, by Roy Rubin and Yoav Kutner, who were co-founders of the American business Varien.
Designed for customization, Magento quickly became one of the most popular solutions for small to enterprise-level companies due to its robust features.
The platform offers advanced product catalogue management, multiple payment and shipping options, and customizable themes. It also provides a strong SEO-friendly structure to boost online visibility.
It also supports multi-store functionality, allowing businesses to manage several stores from one dashboard. With built-in marketing tools, reporting, and analytics, Magento helps companies optimize their sales and customer experience.
Developers can design unique extensions because of its open-source nature, which guarantees industry adaptability. Today, Magento continues to be a leading choice for eCommerce entrepreneurs seeking flexibility and growth.
Pros Of Magento
Magento offers unparalleled flexibility, scalability, and features that empower businesses to create customized, high-performing online stores. Here are the top advantages that make it a preferred platform for growing eCommerce businesses.
1. Highly Customizable And Flexible
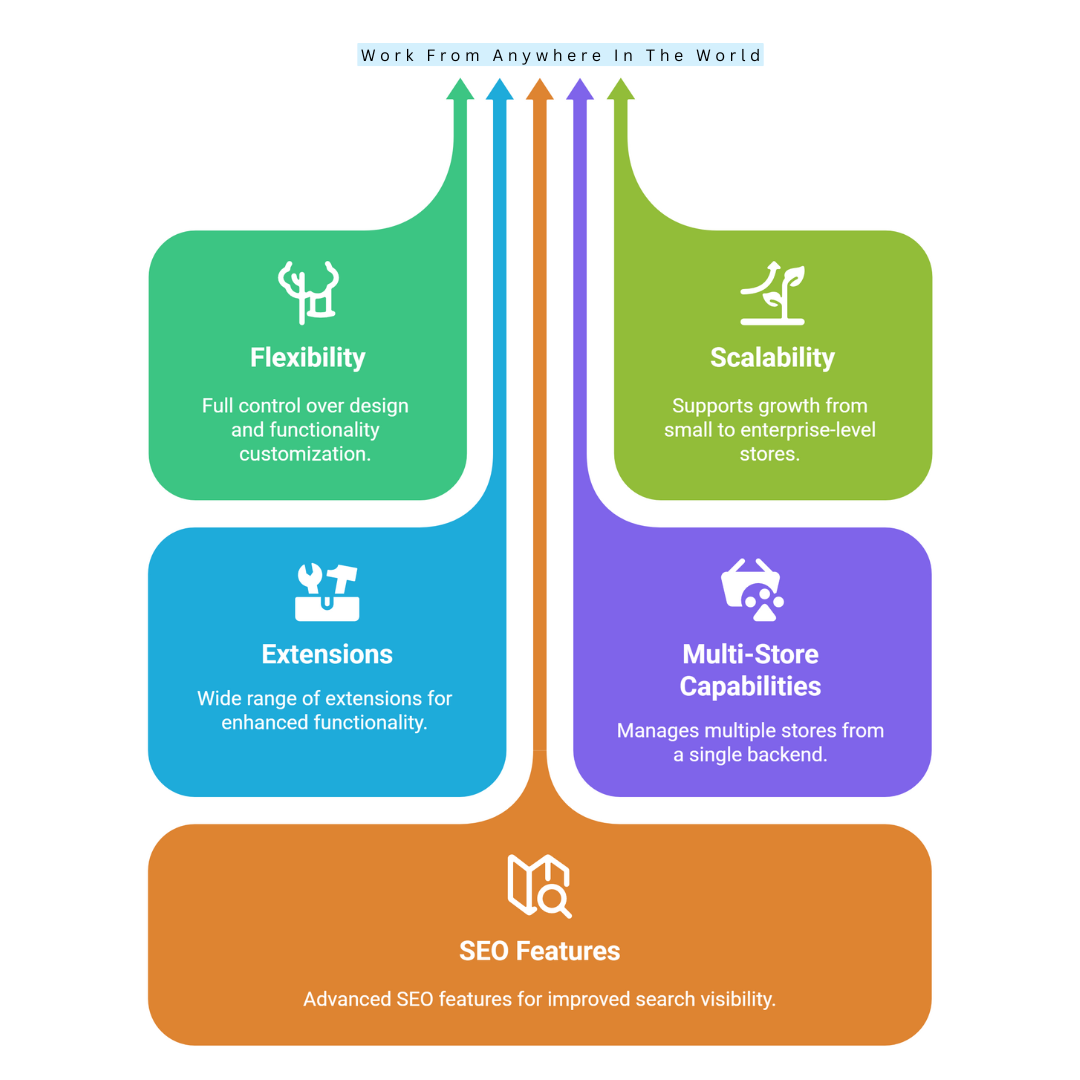
Magento provides unmatched flexibility, enabling store owners and developers to customize design, functionality, and user experience fully.
Unlike restrictive SaaS platforms, it allows deep backend modifications and custom extensions. Businesses can tailor checkout processes, product pages, admin dashboards, and promotions to suit unique workflows.
Want to Start Making Money Online?
Try My #1 Recommendation Program!
Enterprises with complex operational needs benefit from its modular architecture, which allows limitless feature expansion. This flexibility supports unique business requirements and branding strategies.
However, it requires skilled developers to implement advanced customization, making investment in expertise necessary. With proper resources, Magento delivers a highly tailored eCommerce experience that grows alongside the business.
Key Points
- Complete control over design and functionality
- Customizable checkout, products, and admin
- Supports complex business needs
- Requires skilled developers and investment
2. Scalability For Growing Businesses
Magento excels at scalability, supporting small stores with hundreds of products to enterprise-level sites with tens of thousands. Its architecture handles high traffic, large catalogues, and extensive customer bases.
As your business grows, infrastructure upgrades can maintain seamless performance. Multi-server setups, caching, and CDN integrations optimize speed for increasing demand. This makes Magento ideal for ambitious brands planning long-term growth.
While scaling requires technical expertise and strong hosting solutions, businesses gain a platform that grows with them, avoiding migration issues common with less scalable systems. Its capacity ensures reliable performance even during peak seasons.
Key Points
- Handles small to enterprise stores
- Supports extensive catalogues and high traffic
- Optimized with caching and CDN
- Technical expertise and hosting required
3. Wide Range Of Extensions And Integrations
Magento’s marketplace offers thousands of extensions, covering payments, shipping, marketing, analytics, and more. Businesses can integrate ERP, CRM, and automation tools seamlessly, enhancing operational efficiency.
Extensions reduce the need for custom development and accelerate go-to-market timelines. From SEO tools to product customization plugins, Magento’s ecosystem provides almost any functionality required.
Want to Find Out How To Start Your Home-Based Business?
Try My #1 Recommendation Platform!
However, compatibility issues between extensions or with platform updates can occur, requiring careful selection and maintenance.
When properly managed, these integrations enhance Magento’s flexibility and allow businesses to offer a sophisticated, feature-rich shopping experience without reinventing core systems.
Key Points
- Thousands of extensions available
- Integrates with ERP, CRM, and marketing tools
- Speeds up development with ready features
- Requires careful compatibility management
4. Strong Multi-Store Capabilities
Magento allows management of multiple stores from a single backend, making it perfect for businesses operating in various regions or brands.
Each store can have its own products, pricing, layout, and language settings while sharing a unified admin interface. Multi-store management streamlines operations and reduces administrative complexity.
Brands can target different markets without duplicating infrastructure or data management. While this feature is powerful, improper setup can cause performance bottlenecks or administrative confusion.
With expert configuration, businesses enjoy seamless control over multiple storefronts, enabling strategic expansion across regions, demographics, or product lines.
Key Points
- Supports multiple stores from one backend
- Customizable per region, brand, or language
- Streamlines multi-store operations
- Requires expert configuration for efficiency
5. Advanced SEO Features
Magento is SEO-friendly, offering URL customization, meta tags, sitemaps, structured data, and canonical URLs. These features help products rank higher in search engines and drive organic traffic.
Magento’s architecture supports fast-loading sites, further improving SEO and user experience. Advanced SEO extensions can enhance capabilities like automated redirects, content optimization, and schema markup.
Businesses with proper technical knowledge can fully leverage these features to boost search visibility. While setup requires some expertise, Magento offers a solid foundation for long-term SEO success. It helps stores attract more visitors and efficiently convert them into loyal customers.
Key Points
- Built-in SEO features for URLs, meta tags, and sitemaps
- Supports structured data and canonical URLs
- Fast-loading sites improve rankings
- Technical knowledge needed for advanced optimization
6. Strong Security Features
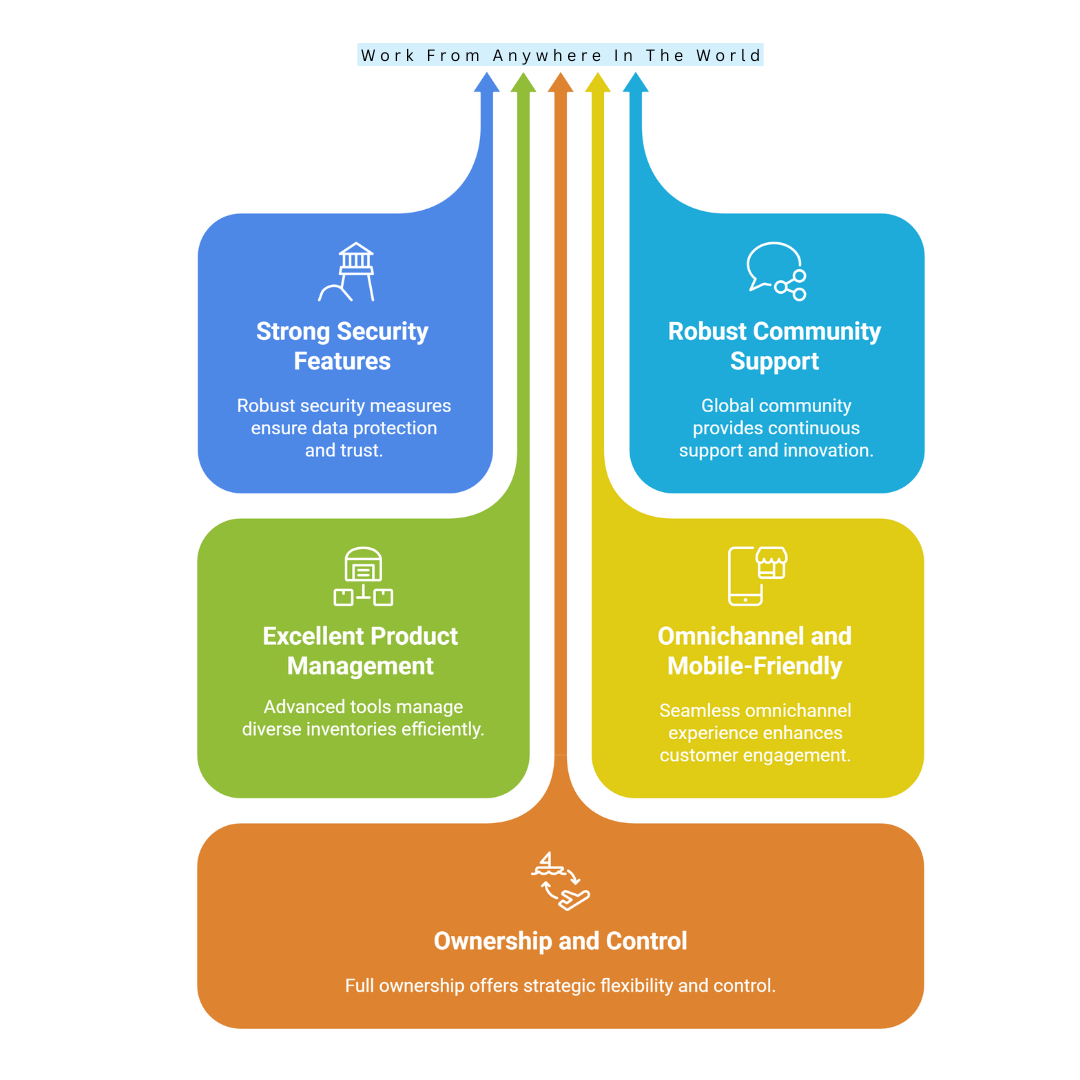
Magento prioritizes security, offering PCI compliance, two-factor authentication, encrypted payment options, and regular patches. Businesses can implement custom security measures, including firewalls and advanced monitoring.
Protecting sensitive customer and payment data builds trust and credibility. Magento’s open-source architecture allows proactive security enhancements based on the company's needs.
However, administrators must apply patches promptly to avoid vulnerabilities. Neglecting updates can compromise data and user trust.
For businesses handling significant transactions, Magento provides a secure foundation to operate safely while maintaining flexibility to add additional security layers tailored to their specific requirements.
Key Points
- PCI compliance and two-factor authentication
- Encrypted payment gateways
- Supports custom security measures
- Requires timely patch updates
7. Robust Community Support
Magento benefits from a large global community, including developers, agencies, and eCommerce experts:
- Forums
- Tutorials
- Official documentation guide
- Troubleshooting
- Development
- Optimization
Certified developers are available to implement complex features or resolve technical challenges. The community contributes to continuous innovation, updates, and shared solutions.
Businesses can leverage this ecosystem to improve store performance, reduce development time, and access professional guidance.
However, advanced solutions often require paid services or expertise. Active community involvement ensures Magento remains current, adaptable, and well-supported for businesses of all sizes seeking reliable assistance.
Key Points
- Large global community and resources
- Forums, tutorials, and documentation
- Access to certified developers
- Paid expertise needed for advanced solutions
8. Excellent Product Management
Magento supports advanced product management, including configurable products, grouped items, and virtual and downloadable products.
Bulk editing tools allow efficient inventory updates, attribute management, and pricing adjustments. Catalogues can be structured to reflect complex product hierarchies. Promotions, discounts, and special pricing rules can be automated.
Are You Tired Of Scams?
Want to Start Making Money Online?
These capabilities make Magento ideal for extensive catalogues and businesses with diverse inventories. Proper product management improves store efficiency, customer experience, and sales conversion.
Although learning all product features takes time, Magento’s comprehensive tools allow businesses to scale inventory without compromising operational efficiency or flexibility.
Key Points
- Handles complex and diverse products
- Supports bulk editing and custom attributes
- Automated pricing and promotions
- Ideal for large-scale inventory management
9. Omnichannel And Mobile-Friendly
Magento supports omnichannel strategies, integrating physical stores, marketplaces, and social platforms into a single system. Its mobile-responsive themes and PWA compatibility ensure a seamless user experience on all devices.
Customers enjoy consistent shopping experiences, whether online, in-store, or via mobile apps. PWA implementation improves speed, engagement, and conversions.
This omnichannel approach helps businesses reach broader audiences and enhance loyalty. However, deploying PWA features requires technical expertise.
With proper implementation, Magento enables unified operations across channels, improving efficiency, customer satisfaction, and brand consistency in an increasingly mobile-first retail environment.
Key Points
- Mobile-responsive and PWA-ready
- Integrates online, offline, and marketplaces
- Enhances customer experience and loyalty
- Skilled developers required for PWA setup
10. Ownership And Control
Magento Open Source gives businesses full ownership of their store, data, and hosting environment. Unlike SaaS platforms, there are no restrictions on customizations, server setup, or data use.
This control allows long-term strategic flexibility and independence from third-party providers. Businesses can implement specific workflows, integrations, and security measures.
While full ownership provides freedom, it also carries responsibility for updates, security, and server management. Businesses must maintain infrastructure, apply patches, and monitor performance.
For companies seeking autonomy and long-term growth potential, Magento provides unparalleled control over all aspects of their eCommerce operations.
Key Points
- Full store and data ownership
- No SaaS restrictions on customizations
- Flexible infrastructure and workflow control
- Responsible for maintenance and hosting
Cons Of Magento
Despite its strengths, Magento has challenges such as complexity, high costs, and maintenance requirements. Here are the main drawbacks businesses should consider before committing to this powerful eCommerce platform.
1. Steep Learning Curve
Magento is complex and not suitable for beginners. Its backend architecture, extension management, and development requirements can overwhelm new users.
Without prior technical knowledge, small business owners may struggle to configure features, themes, and workflows. Proper training or hiring certified developers is often essential.
Although the platform is robust, the learning curve can delay launches and increase initial costs. For teams without technical resources, Magento can be intimidating.
Investing in developer expertise or professional training ensures proper implementation, reducing errors and maximizing platform benefits while maintaining efficient store management.
Key Points
- Complex backend and features
- Not beginner-friendly
- Requires training or certified developers
- Learning curve may delay launch and increase costs
2. High Development Costs
While Magento Open Source is free, the actual implementation can be expensive. Custom development, themes, and extensions often require professional developers.
Adobe Commerce licensing adds additional costs for enterprise features. Small businesses may struggle with these expenses.
Want To Learn How To Create Your Own Website And Online Business?
Try My #1 Recommendation Training And Hosting Platform!
Hiring certified developers or agencies to build, maintain, and optimize a Magento store can significantly increase budgets compared to SaaS alternatives.
Businesses must plan financially for setup, ongoing development, and feature expansion to avoid unexpected expenses. Without proper investment, the full potential of Magento cannot be utilized effectively.
Key Points
- Free platform but high development cost
- Adobe Commerce licensing is expensive
- Certified developers or agencies are often required
- Financial planning is essential for success
3. Hosting And Maintenance Responsibility
Magento users must manage their own hosting, including server setup, speed optimization, and security. Unlike SaaS platforms, hosting and maintenance are the business’s responsibility.
Poor server management can lead to slow performance, downtime, and security risks. Regular updates and patching are necessary to maintain performance and protect customer data.
This adds operational complexity and cost. Businesses must invest in reliable hosting, monitoring, and professional support.
While providing complete control, the responsibility for infrastructure and maintenance can be challenging for smaller teams lacking technical expertise.
Key Points
- Self-managed hosting required
- Maintenance, updates, and security responsibility
- Poor hosting affects performance and uptime
- Requires investment in infrastructure and support
4. Resource-Intensive Performance
Magento’s advanced features and architecture can be heavy on server resources. Extensive catalogues, high traffic, and multiple extensions can slow down the site if not optimized properly.
Businesses need caching, CDN, and optimized hosting to maintain speed. Performance issues can hurt SEO rankings, conversion rates, and customer experience. Proper technical setup and ongoing monitoring are required to ensure smooth operations.
For businesses without technical support, Magento’s resource requirements may become a limitation, requiring careful planning and infrastructure investment to avoid performance bottlenecks.
Key Points
- Resource-heavy platform
- Extensive catalogues and extensions can slow performance
- Requires caching, CDN, and optimized hosting
- Technical support is needed for smooth operations
5. Complex Upgrades And Migration
Upgrading Magento versions or migrating from other platforms is time-consuming and technically challenging.
Extension compatibility, theme updates, and data migration require skilled developers. Businesses may face downtime, bugs, or errors if updates are not handled carefully.
Proper planning and testing are essential. Unlike simpler SaaS platforms, Magento upgrades demand technical expertise and significant effort.
While updates bring performance, security, and feature improvements, the complexity can discourage frequent version changes.
Businesses must allocate sufficient resources and professional support to ensure smooth upgrades without disrupting store operations.
Key Points
- Upgrades and migrations are complex
- Requires skilled developers
- Risk of downtime or errors
- Planning and testing are essential

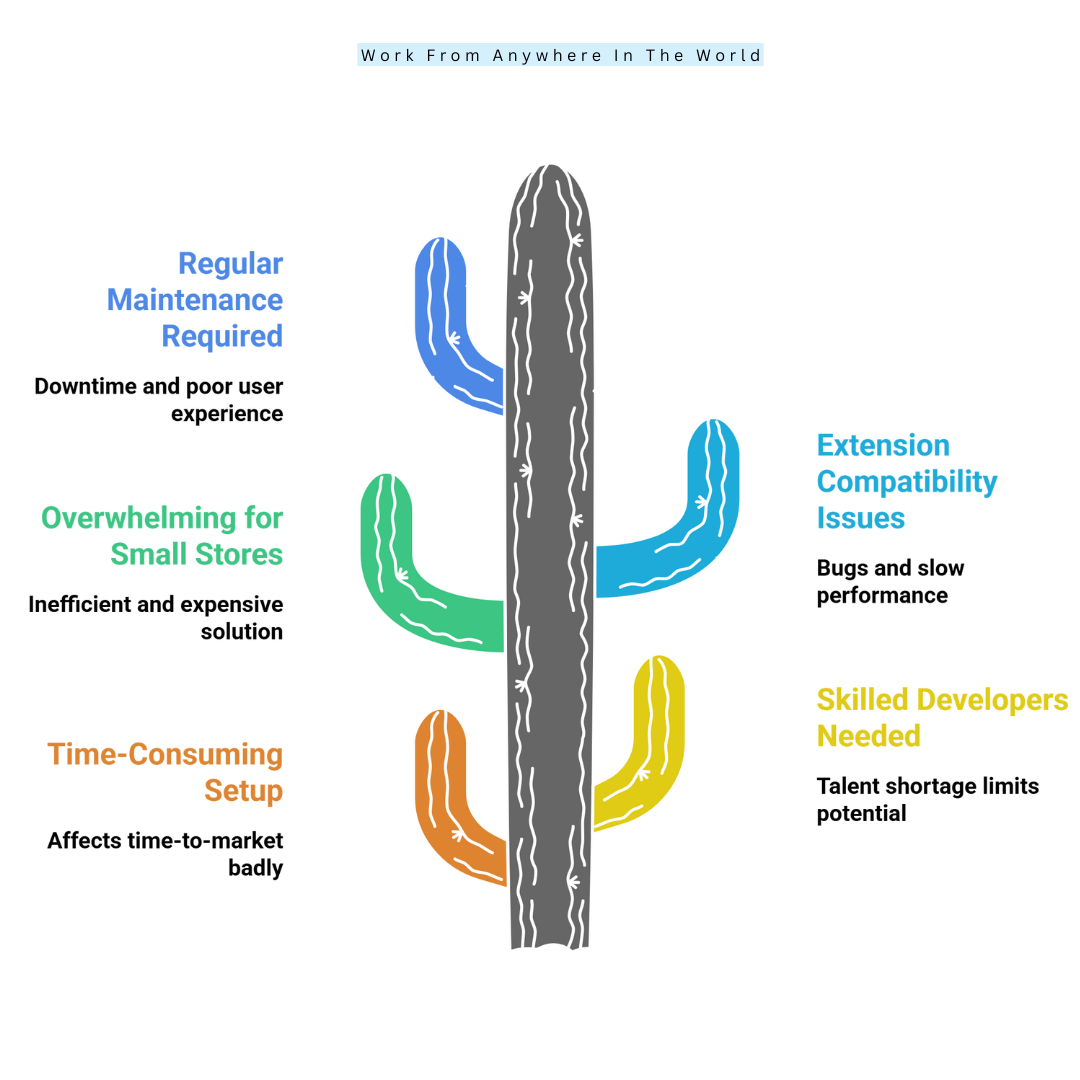
6. Time-Consuming Setup
Magento setup involves hosting configuration, theme customization, extension installation, and backend optimization. The process can take weeks or months, depending on complexity.
Unlike SaaS platforms with quick setup, Magento requires technical expertise, planning, and testing. Small businesses or startups may find the setup time overwhelming.
Although the result is highly flexible and scalable, initial implementation delays can affect time-to-market. For businesses to have a fully operating, optimized Magento store, they must be willing to spend money on setup, training, and development.
Key Points
- Setup is long and technical
- Requires configuration, customization, and testing
- Slower launch compared to SaaS platforms
- Investment in time and resources is essential
7. Requires Skilled Developers
Maximizing Magento requires certified developers familiar with its architecture. Finding and retaining such experts can be expensive and competitive.
Small businesses may struggle to hire qualified talent, limiting the platform’s potential. Without skilled developers, customization, optimization, and extension management may be compromised.
While Magento provides powerful capabilities, its practical use relies heavily on professional expertise. Businesses should consider developer availability and cost when choosing Magento, as insufficient technical support can result in poor performance, delays, and underutilization of the platform’s robust features.
Key Points
- Certified developers needed
- Hiring is costly and competitive
- Small businesses may face a talent shortage
- Professional expertise ensures optimal use
8. Overwhelming For Small Stores
Magento is overkill for small stores with simple requirements. Its complexity, cost, and maintenance demands outweigh the benefits for lightweight operations.
SaaS platforms like Shopify or WooCommerce offer simpler alternatives with faster setup. Small teams may struggle with technical management and infrastructure needs.
Magento’s features are most useful for mid-sized to enterprise businesses. While powerful, its resource demands can make small stores inefficient and expensive.
Only businesses planning significant growth or complex operations should consider Magento; otherwise, simpler platforms may provide faster, more cost-effective solutions without sacrificing essential functionality.
Key Points
- Too complex for small stores
- High cost and maintenance
- Simpler SaaS alternatives exist
- Best for mid-sized to enterprise businesses
9. Extension Compatibility Issues
Magento’s vast marketplace has thousands of extensions, but not all are compatible with each other or new versions. Conflicts can cause bugs, slow performance, or crashes.
Businesses need skilled developers to test, fix, and manage extension interactions. Regular updates and careful selection are essential. Mismanaged extensions can create security risks or degrade user experience.
While extensions enhance functionality, Magento’s reliance on third-party modules requires technical oversight to maintain stability, highlighting the need for expert management to ensure smooth operation and optimal performance.
Key Points
- Extensions may conflict with each other
- Can cause bugs or slow performance
- Requires careful selection and testing
- Skilled developers are needed to manage stability
10. Regular Maintenance Required
Magento stores demand ongoing maintenance, including security patches, software updates, and server optimization. Neglecting maintenance can result in vulnerabilities, downtime, and poor user experience.
Unlike SaaS platforms that handle updates automatically, Magento puts the responsibility on businesses. Regular attention ensures security, speed, and feature reliability.
Without proactive management, technical debt can accumulate, leading to higher costs and risks. Businesses must plan resources for continuous maintenance to preserve store efficiency, safety, and performance.
Maintenance is essential to leverage Magento’s full power and provide a reliable shopping experience for customers.
Key Points
- Requires ongoing updates and patches
- Maintenance responsibility for the business
- Ensures security and performance
- Neglect can lead to risks and higher costs
Conclusion
In conclusion, this Magento review shows why Magento remains a top choice for ambitious eCommerce businesses. Its robust features, customization options, and scalability make it ideal for stores of all sizes.
While there are considerations to keep in mind, the platform’s benefits far outweigh the challenges. If you’re ready to elevate your online business, Magento provides the tools and flexibility to achieve lasting eCommerce success.
I trust you enjoyed this article about the Magento Review: Honest Pros And Cons For E-Commerce Success. Please stay tuned for more articles. Take care!
JeannetteZ
Want to Learn How to Build Your Own Home-Based Online Business And Start Making Money Online From Your Comfortable Couch?
Try Wealthy Affiliate!
Your Opinion Is Important To Me
Do you have thoughts, ideas, or questions? I would love to hear from you. Please share your questions, experiences, remarks, and suggestions about the Magento Review: Honest Pros And Cons For E-Commerce Success in the comments below. You can also email me at Jeannette@WorkFromAnywhereInTheWorld.com.
Disclosure
This post may contain affiliate links. I earn from qualifying purchases as an Amazon Associate and through other affiliate programs. Please read my full affiliate disclosure.
You may also enjoy the following articles:
Wealthy Affiliate Coupons For Premium Memberships
Wealthy Affiliate Review – Scam or Legit? The Truth Exposed
An Insider Wealthy Affiliate Review
The Ultimate Guide To E-Commerce Business Models
How To Start An Online Store – Easy Step-By-Step Guide


